
Export Functionality
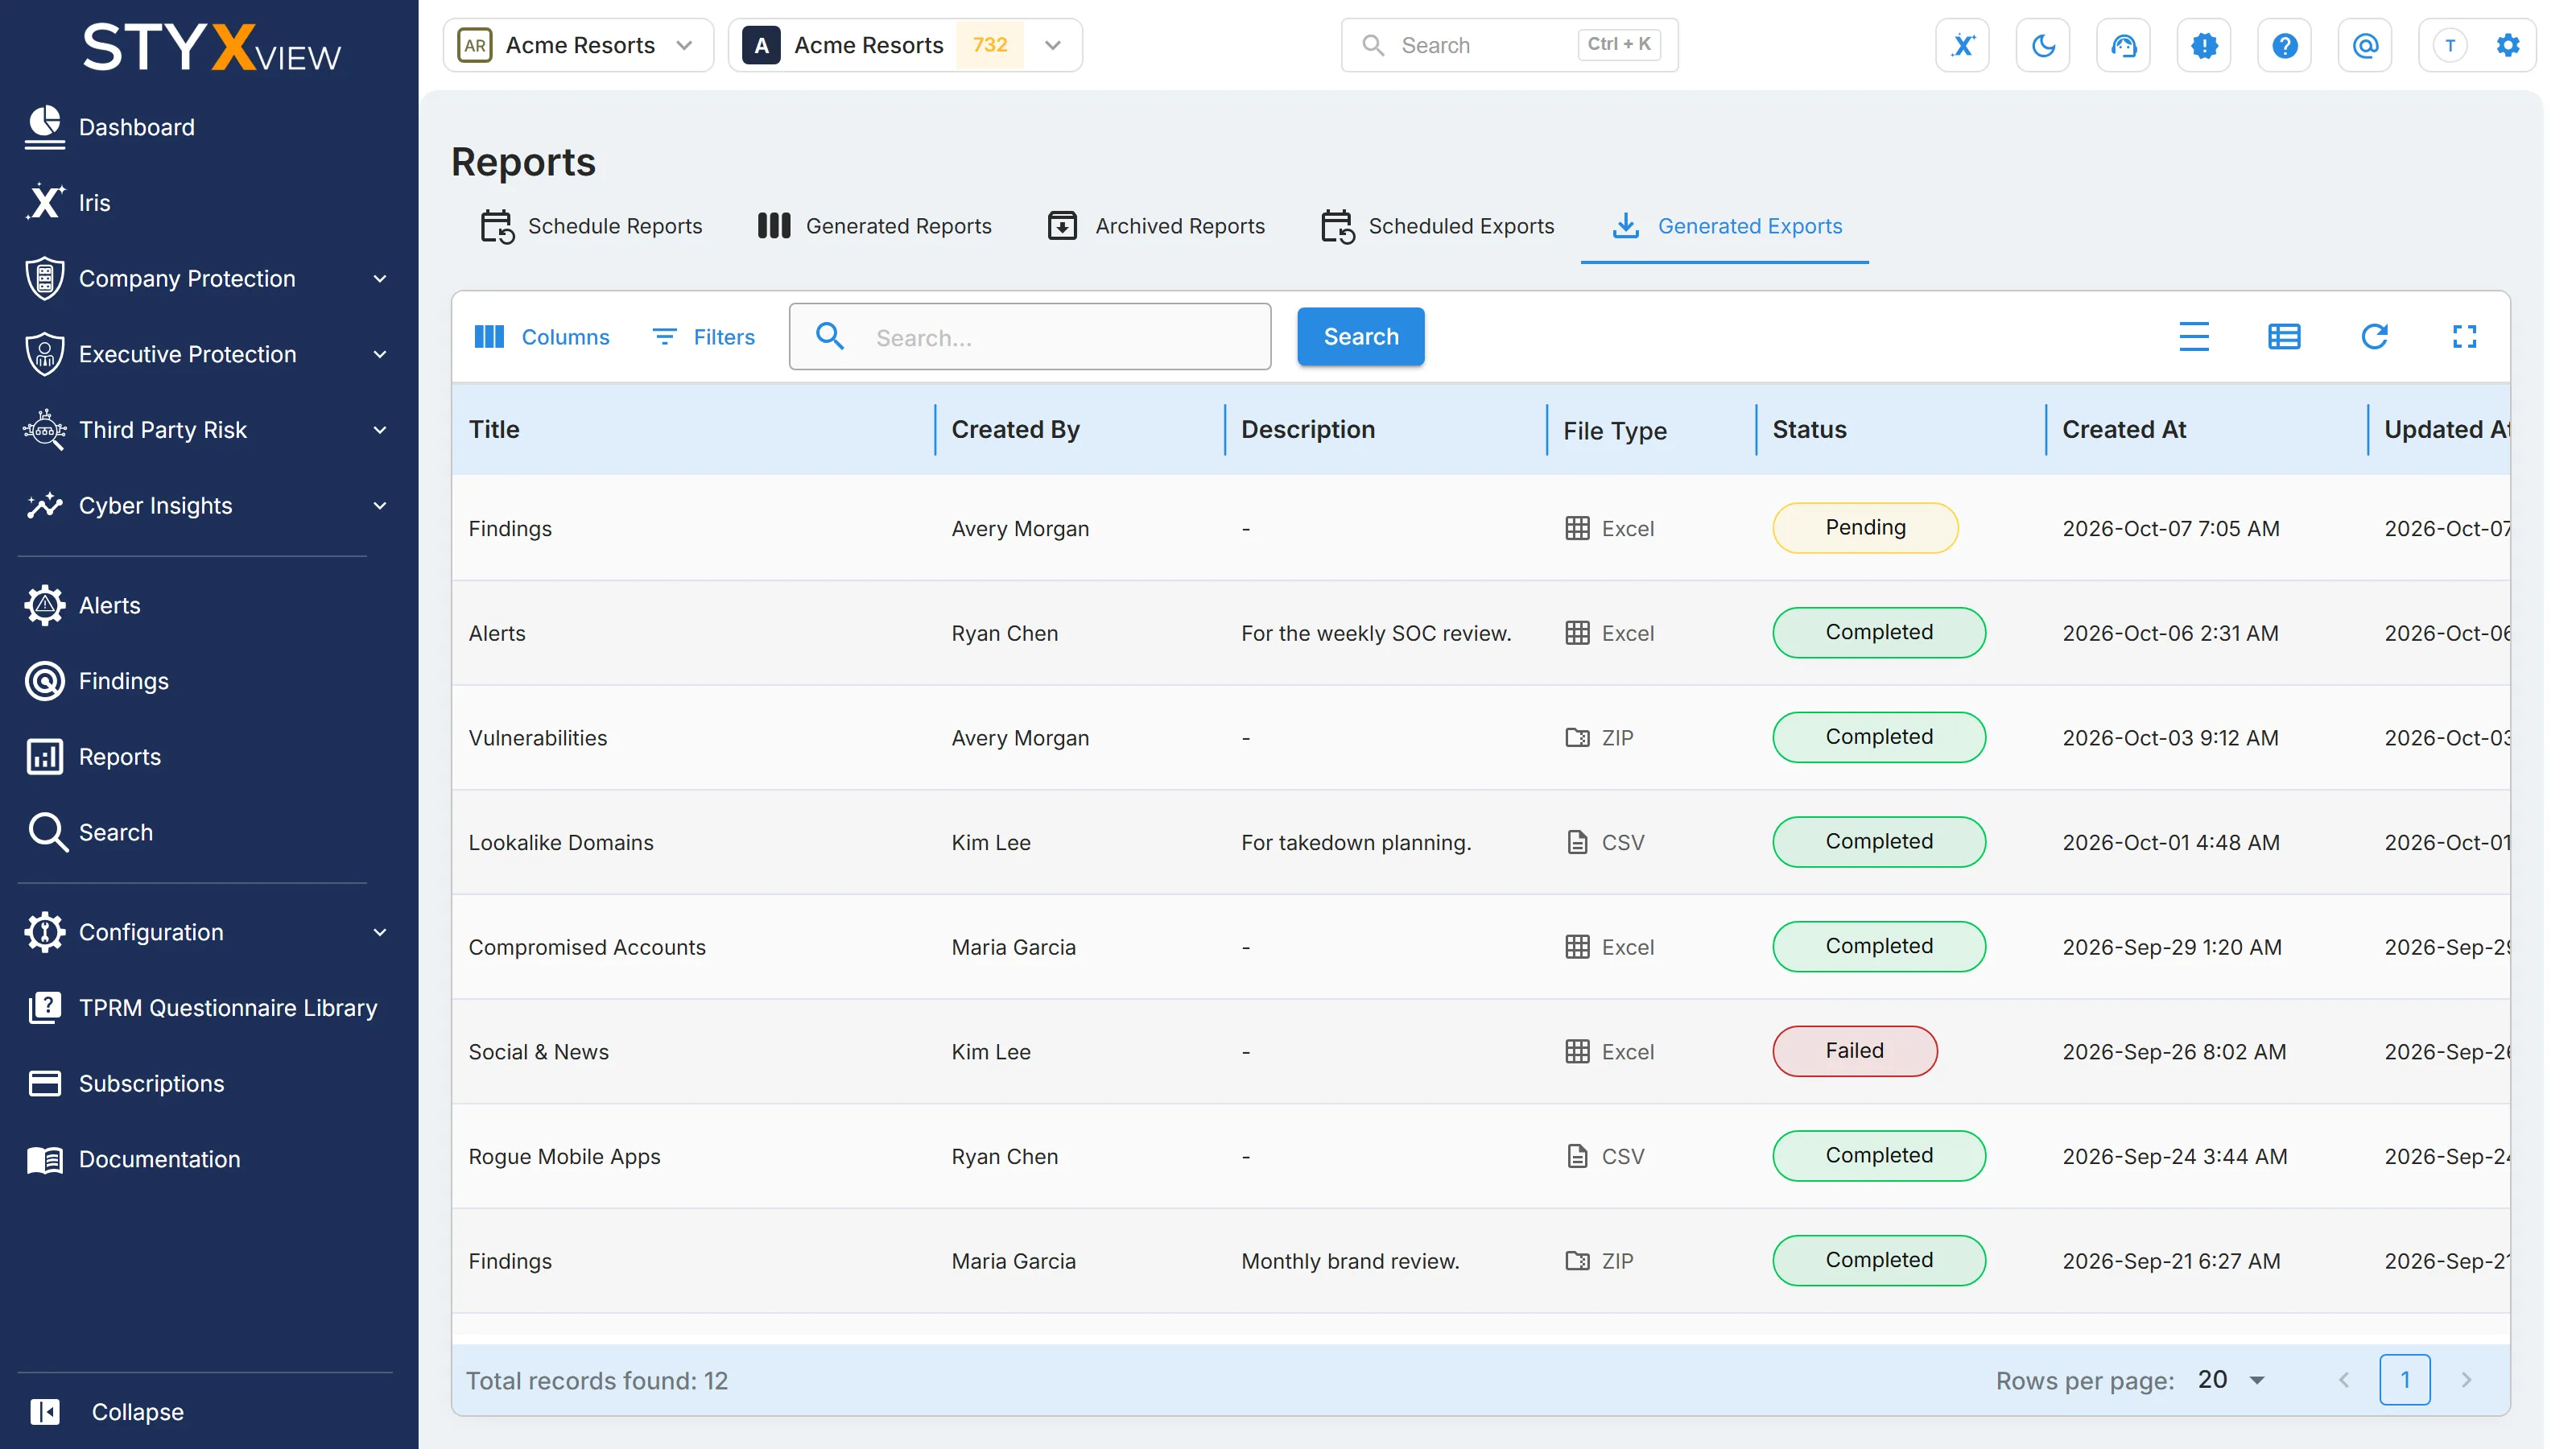
You can export the data in StyxView's tables to Excel (XLSX) or CSV. On Findings, Alerts, and some module tables, you can export once or on a schedule, and send the files by email. Your exports are listed in "Reports", on the "Scheduled Exports" and "Generated Exports" tabs.
An export carries over the table's current search, filters, and sort order, so set those up first.
1. Accessing Export Options
Section titled “1. Accessing Export Options”-
Open the table you want to export, for example Findings or Alerts.
-
Set the search, filters, sort order, and columns you want.
-
Select the Export icon at the top right of the table.

What happens next depends on the table:
-
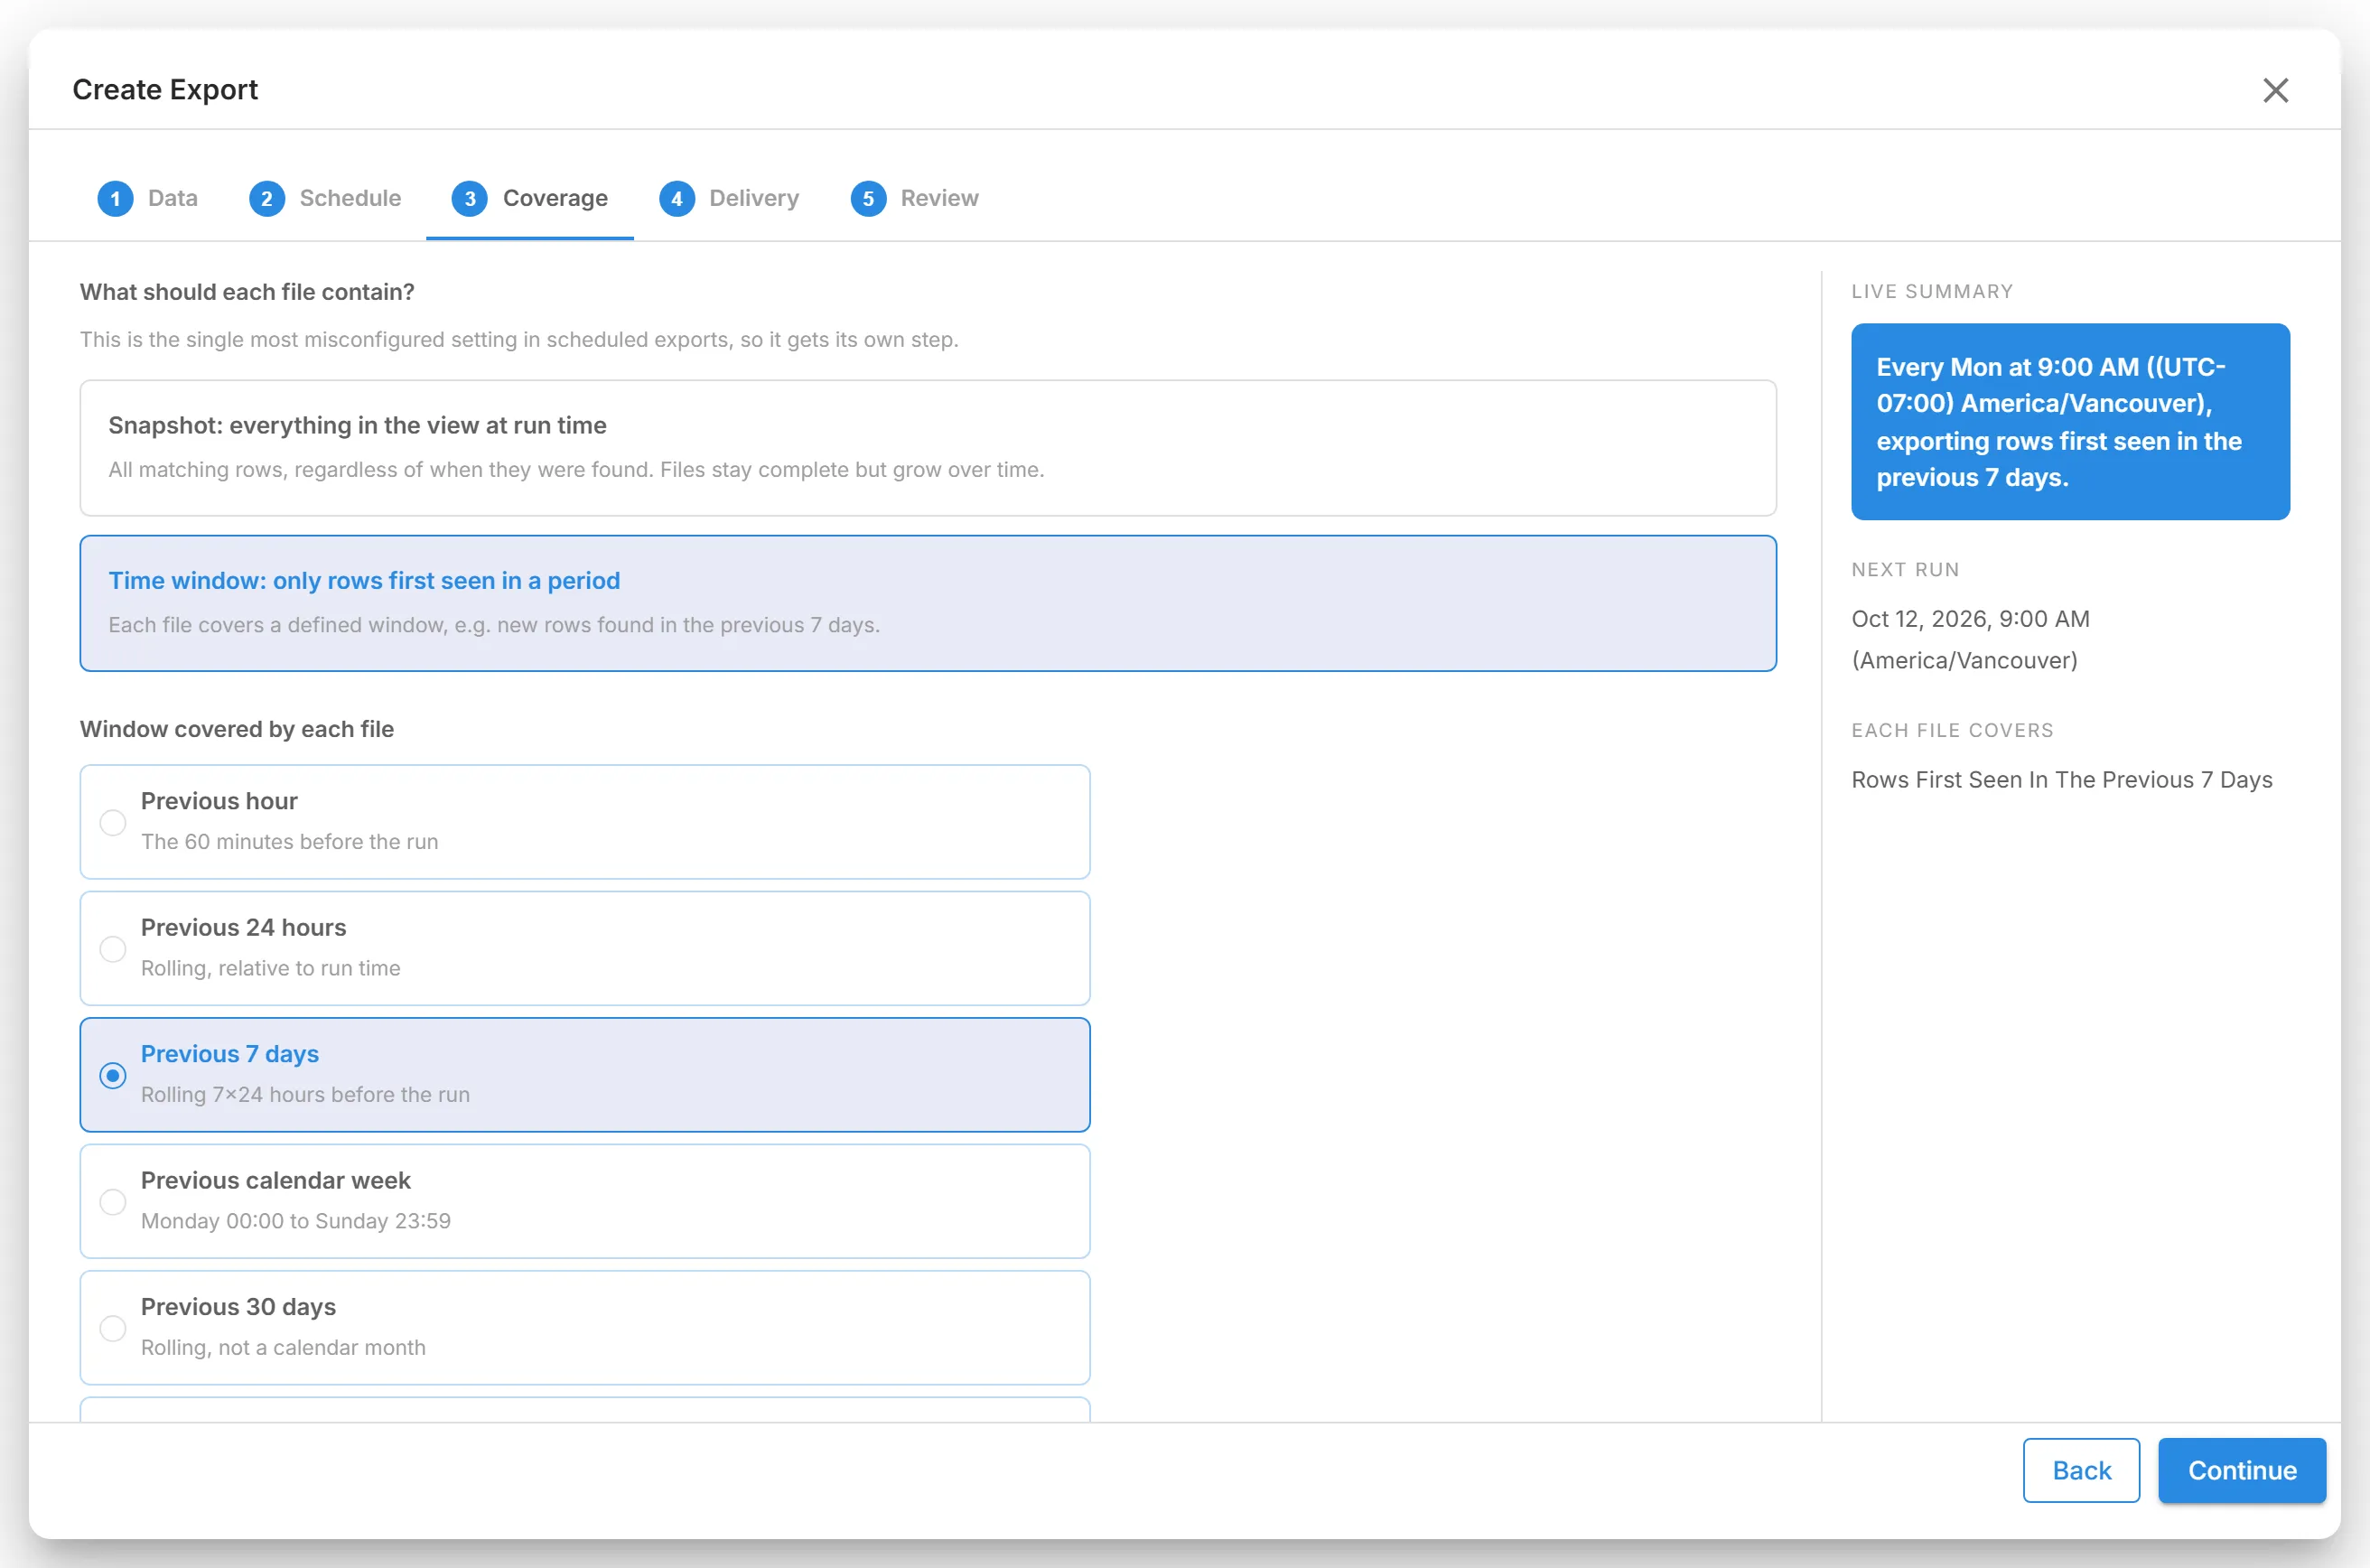
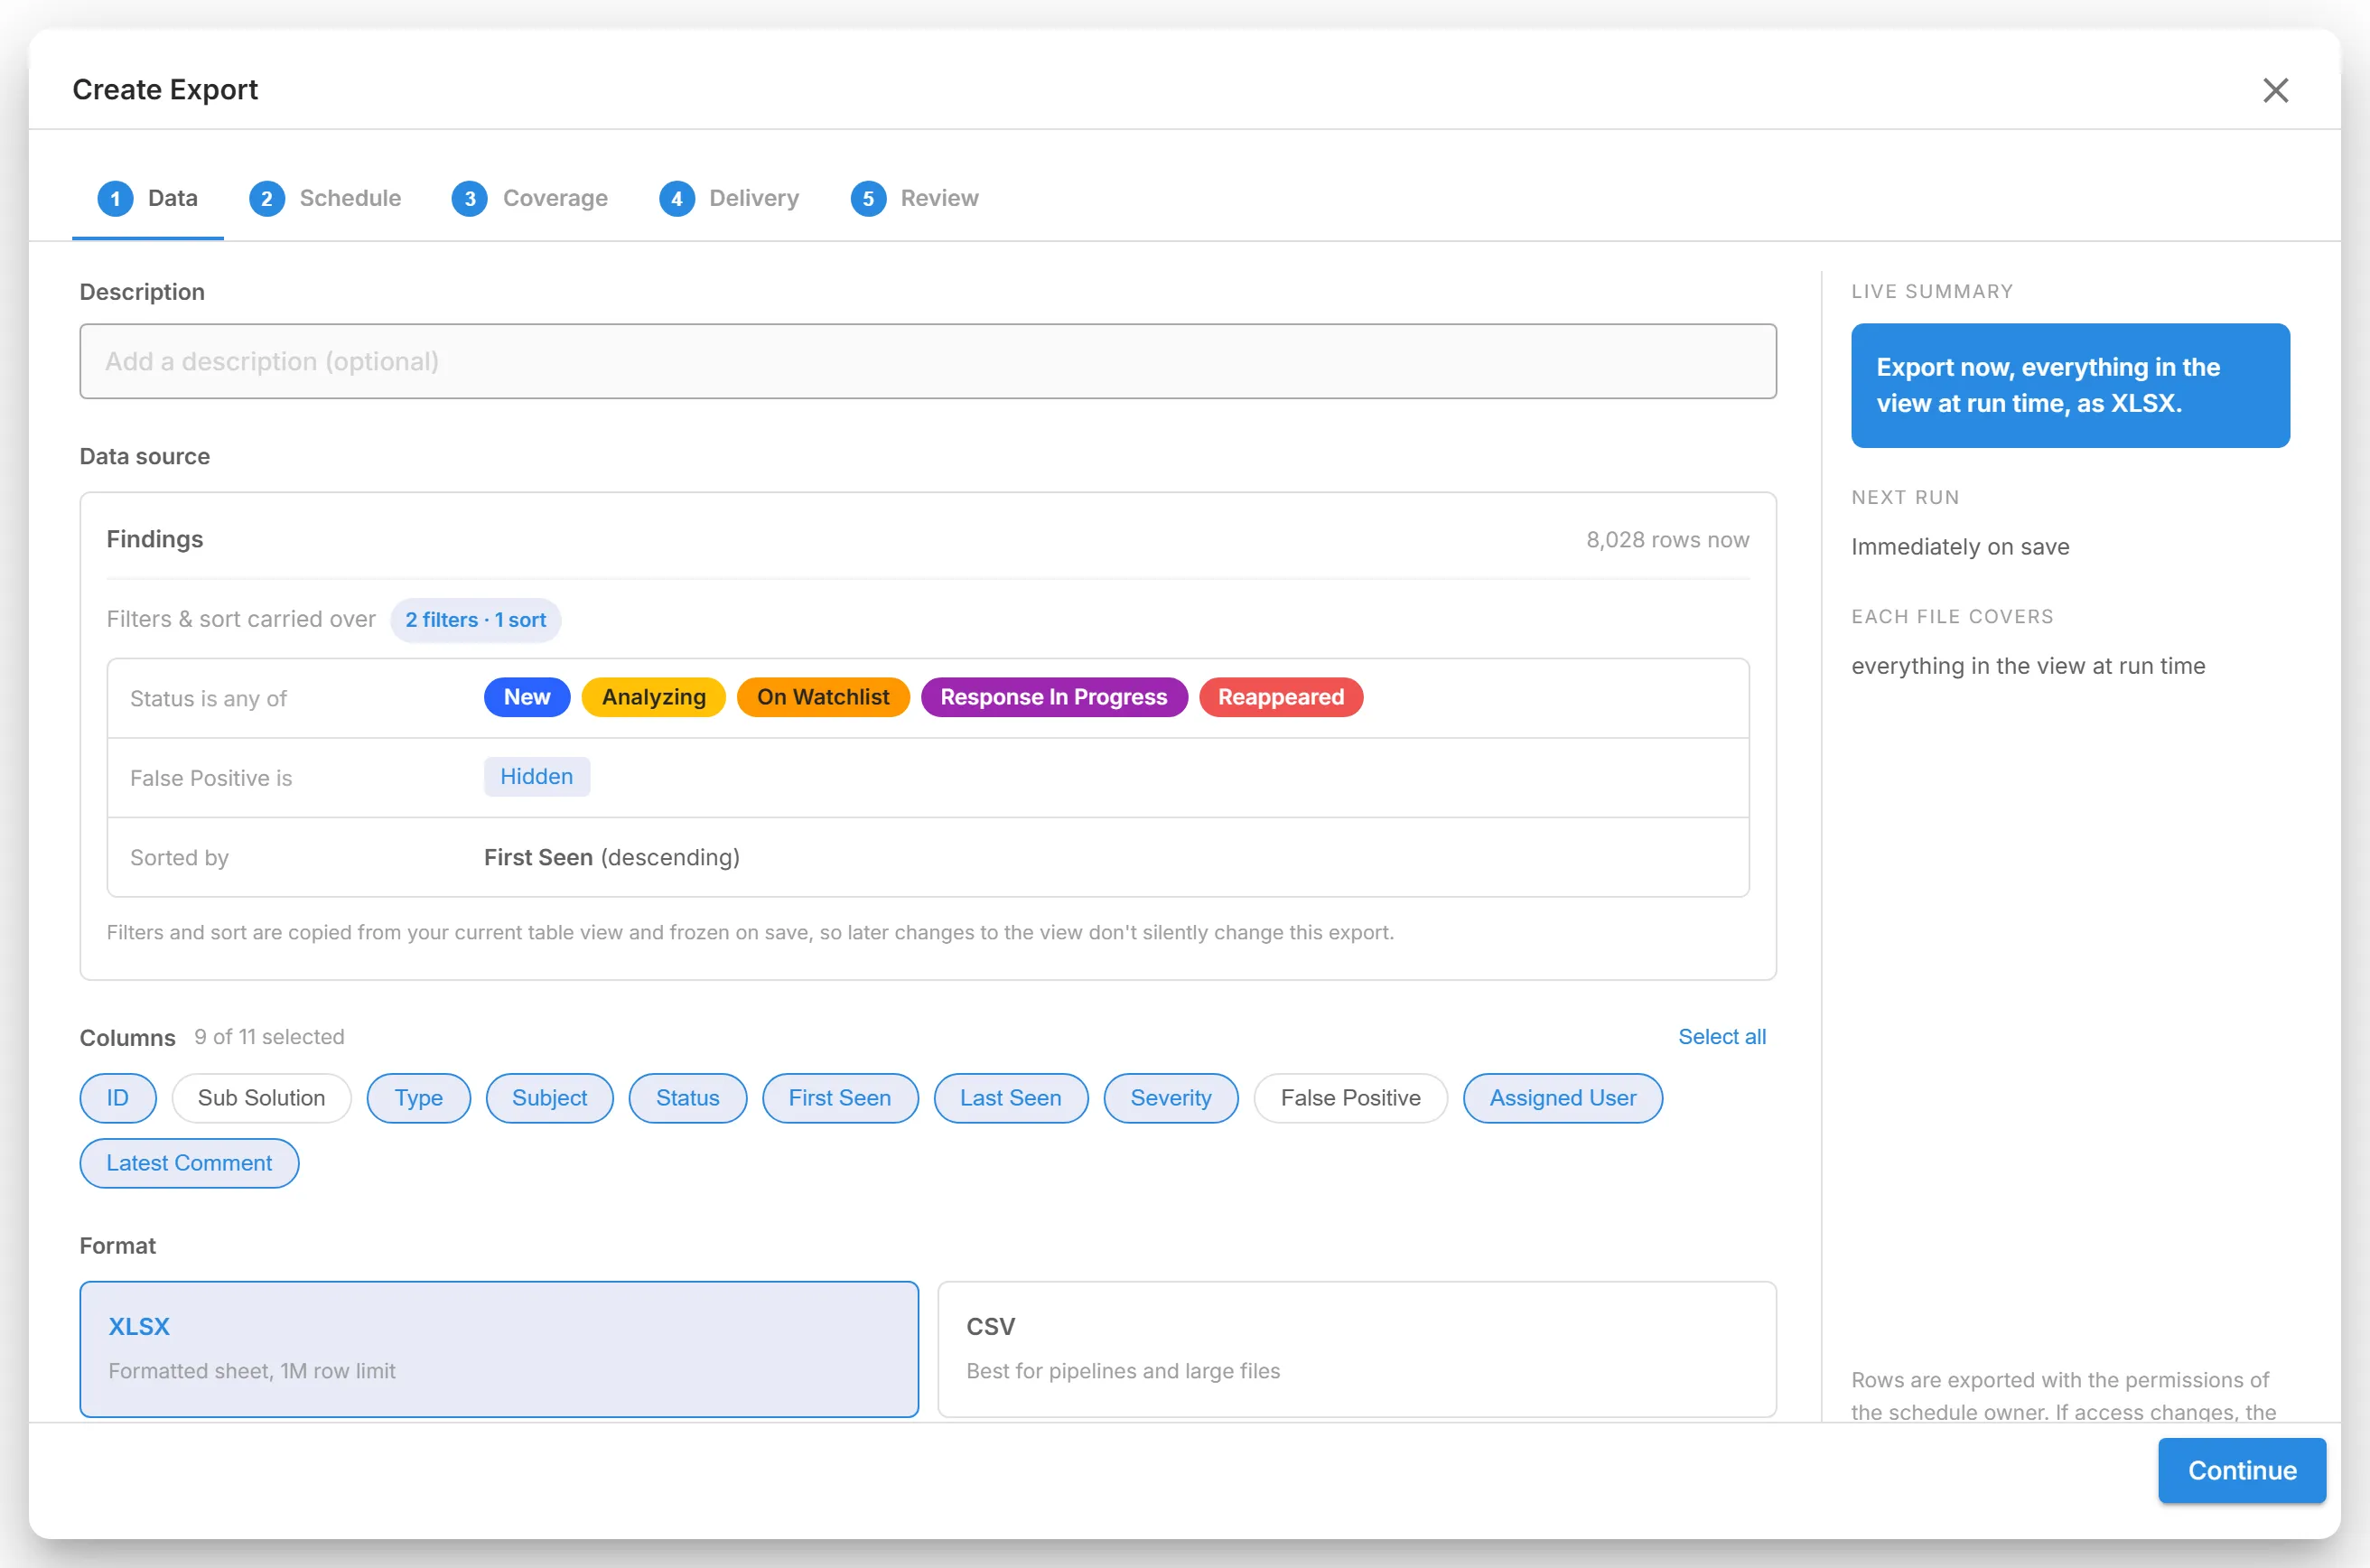
On Findings, Alerts, and some module tables, the "Create Export" dialog opens. It has five steps: "Data", "Schedule", "Coverage", "Delivery", and "Review". The rest of this page describes it.
-
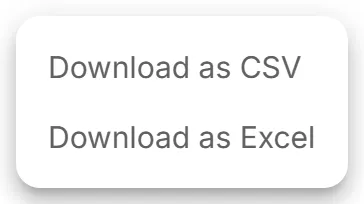
On other tables, choose "Download as CSV" or "Download as Excel". The file downloads straight away, with every row that matches your search and filters and the columns you can see.
Move between the steps with "Continue" and "Back", or select a step's name at the top of the dialog.
2. Export Once
Section titled “2. Export Once”-
In the "Data" step:
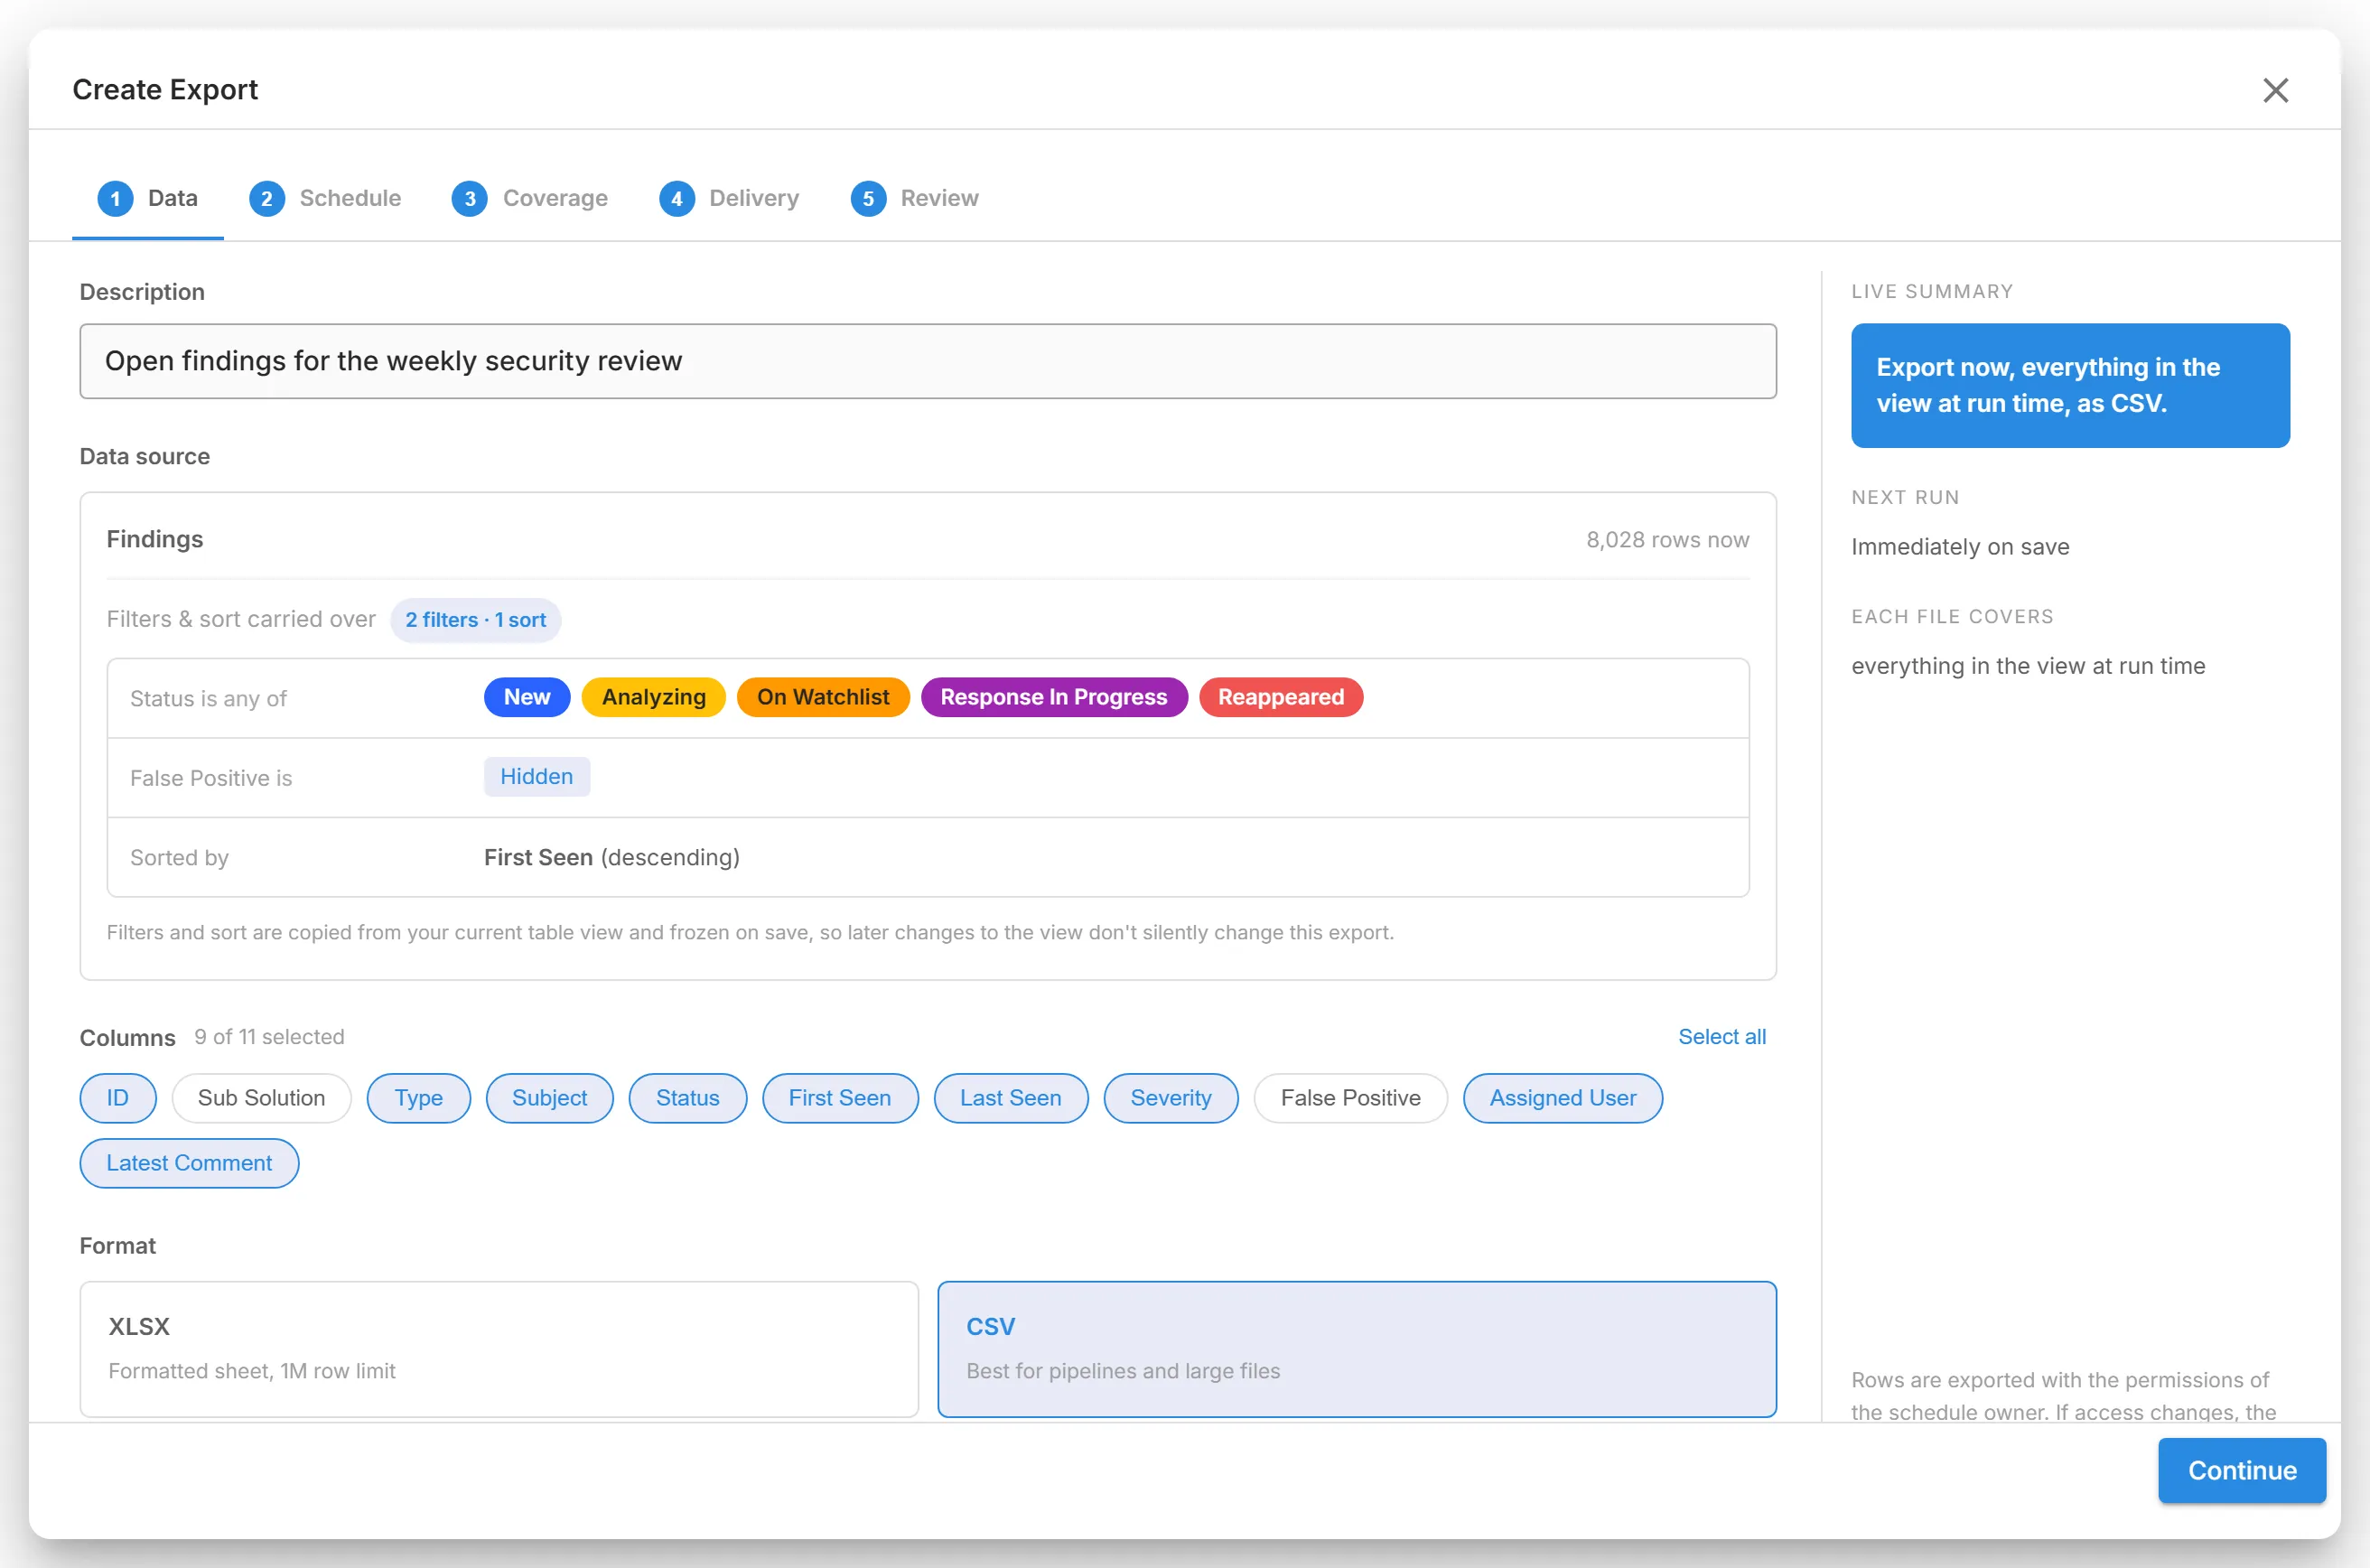
- Optional: enter a "Description" to recognise the export later.
- Check the "Data source": the table, how many rows it has now, and the filters and sort order carried over.
- Under "Columns", choose the columns to export. The columns you can see in the table are selected to start with (on Alerts, every column). Select "Select all" to include every column.
- Under "Format", choose "XLSX", a formatted sheet with a limit of 1 million rows, or "CSV", best for pipelines and large files.
-
In the "Schedule" step, under "Run this export", select "Once".
-
In the "Coverage" step, keep "Snapshot: everything in the view at run time". See Coverage for the other option.
-
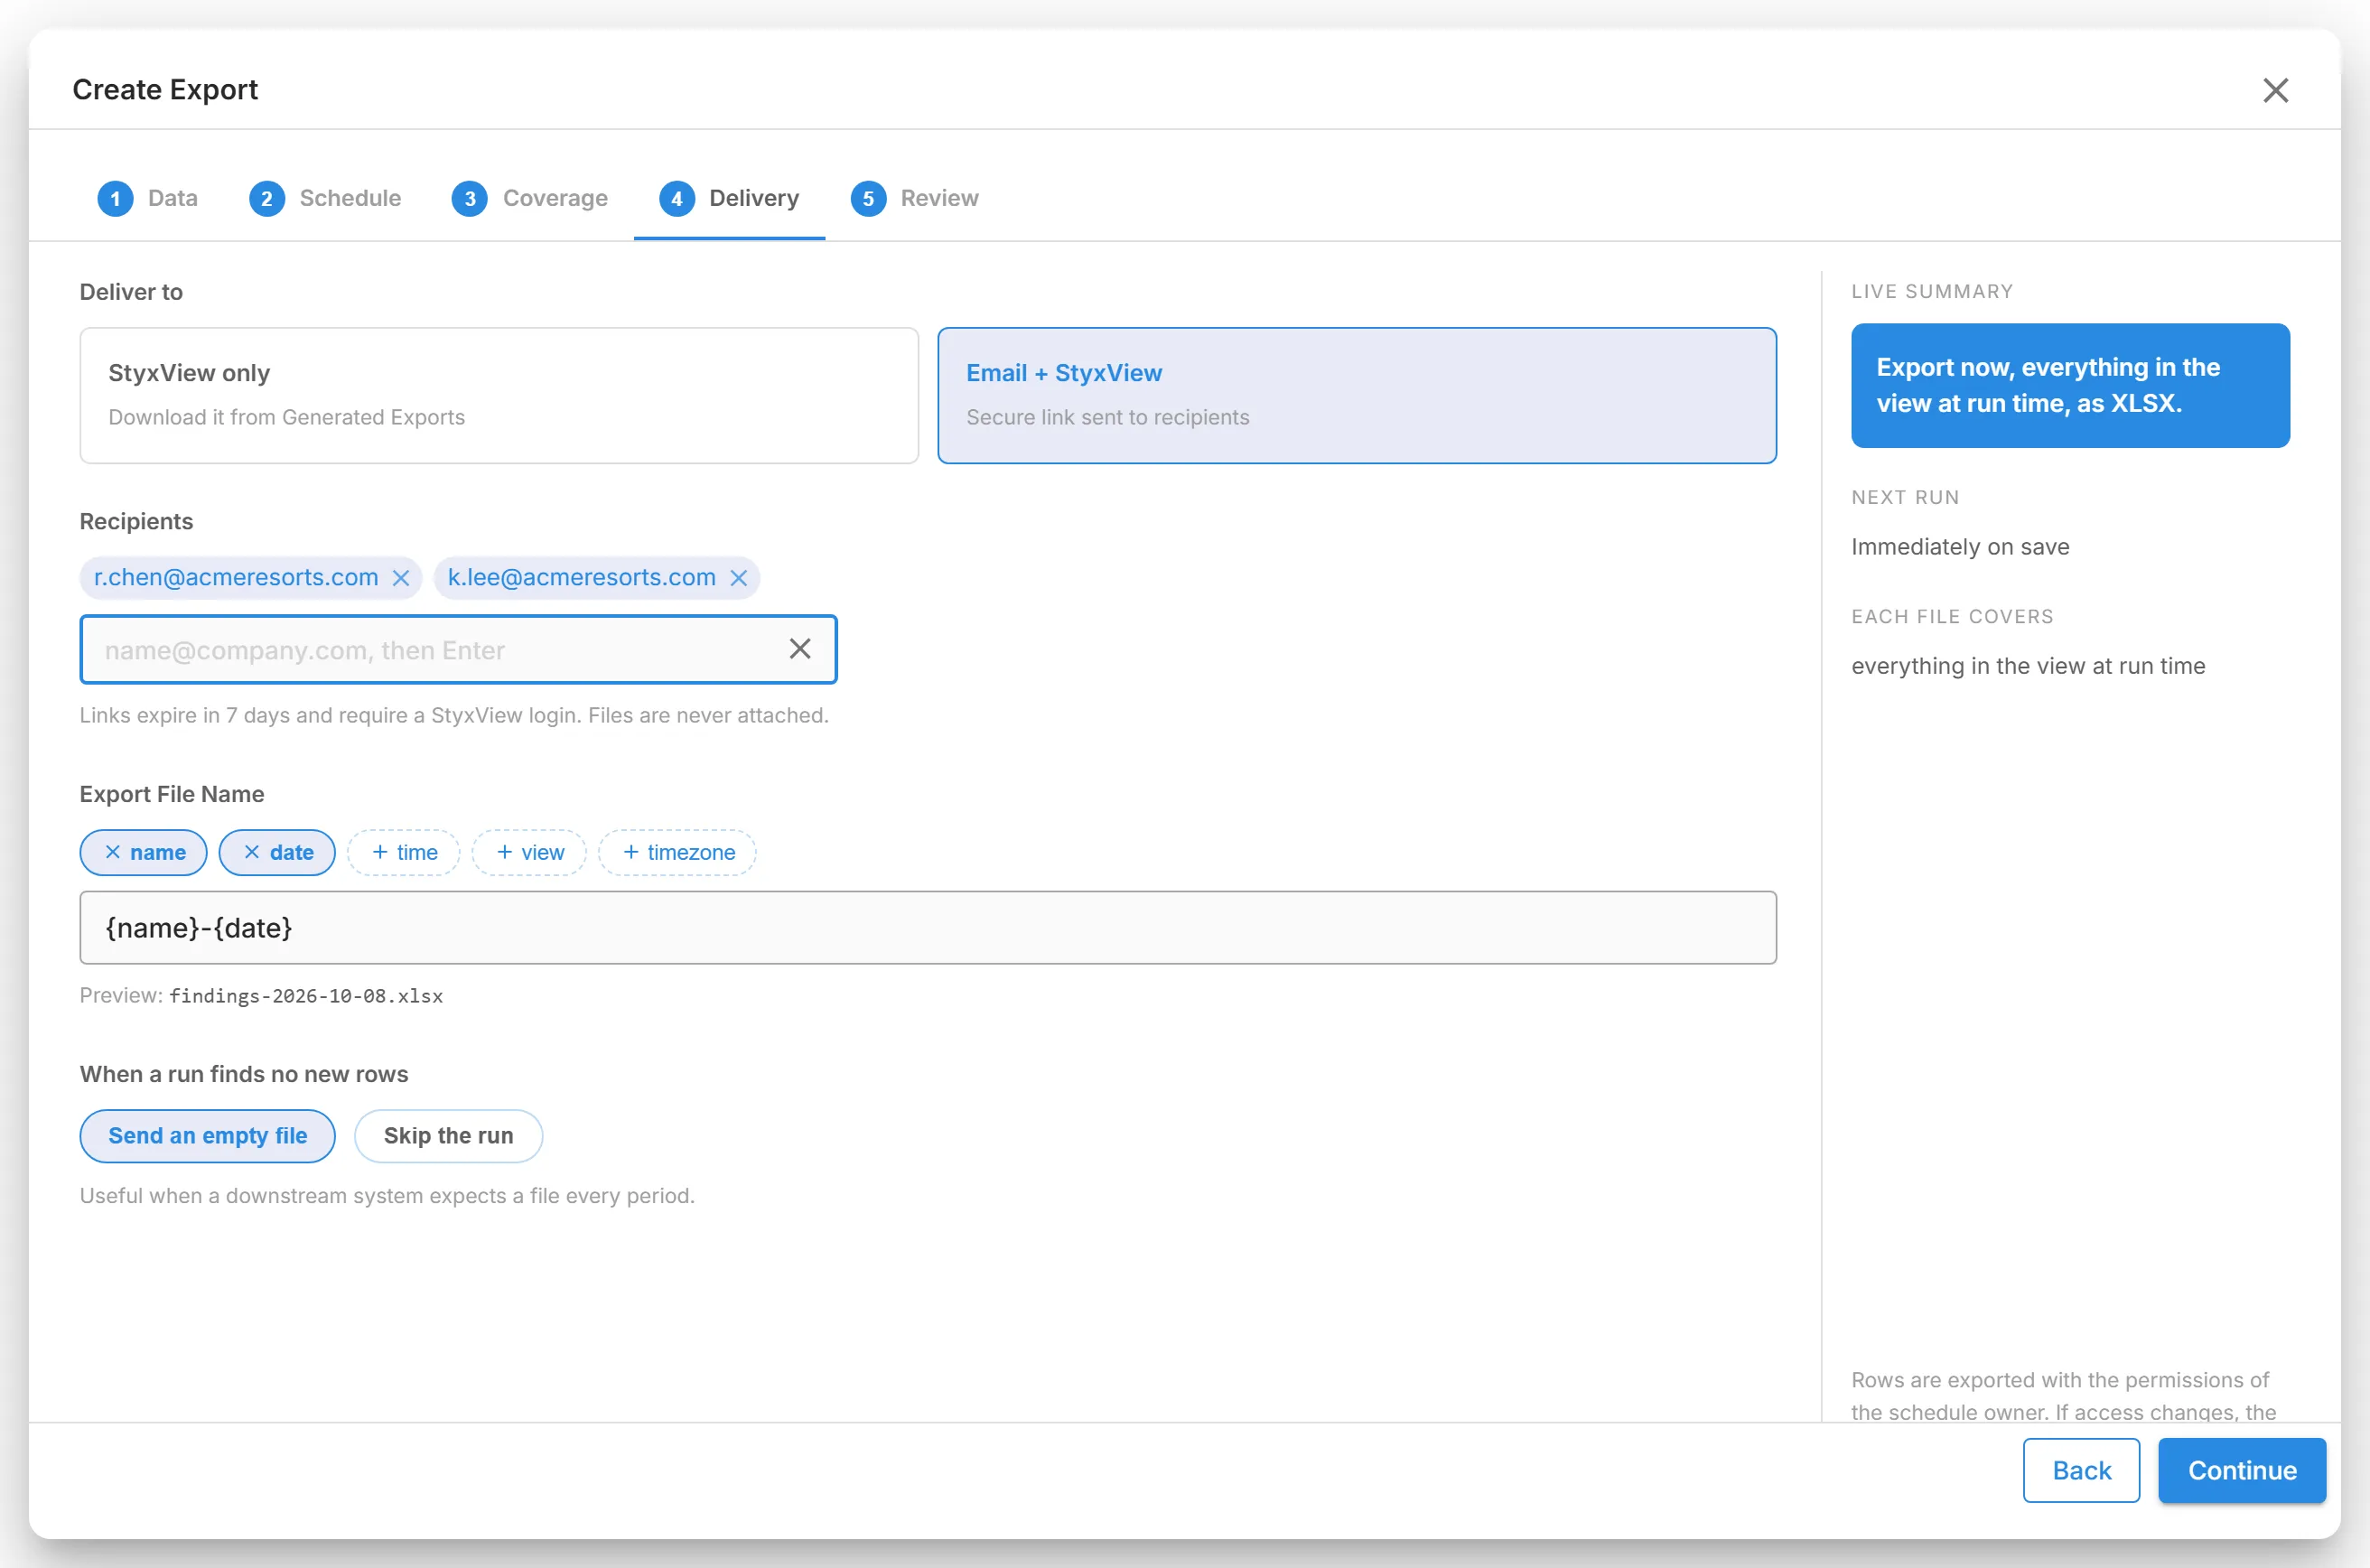
In the "Delivery" step, choose where the file goes:
- "StyxView only": download it from "Generated Exports".
- "Email + StyxView": StyxView also emails a secure link to the "Recipients". Choose users from the list, or type an address and press Enter. Links expire in 7 days and need a StyxView login. Files are never attached to the email.
-
Optional: under "Export File Name", build the file name from the tokens name, date, time, view, and timezone. The preview shows the result.
-
In the "Review" step, check the summary. Select "Edit" next to a section to change it.
-
Select "Export Now".
StyxView opens "Reports" → "Generated Exports", where the export appears. Download it when its status is Completed.
3. Scheduled Exports
Section titled “3. Scheduled Exports”-
Complete the "Data" step as for a one-time export.
-
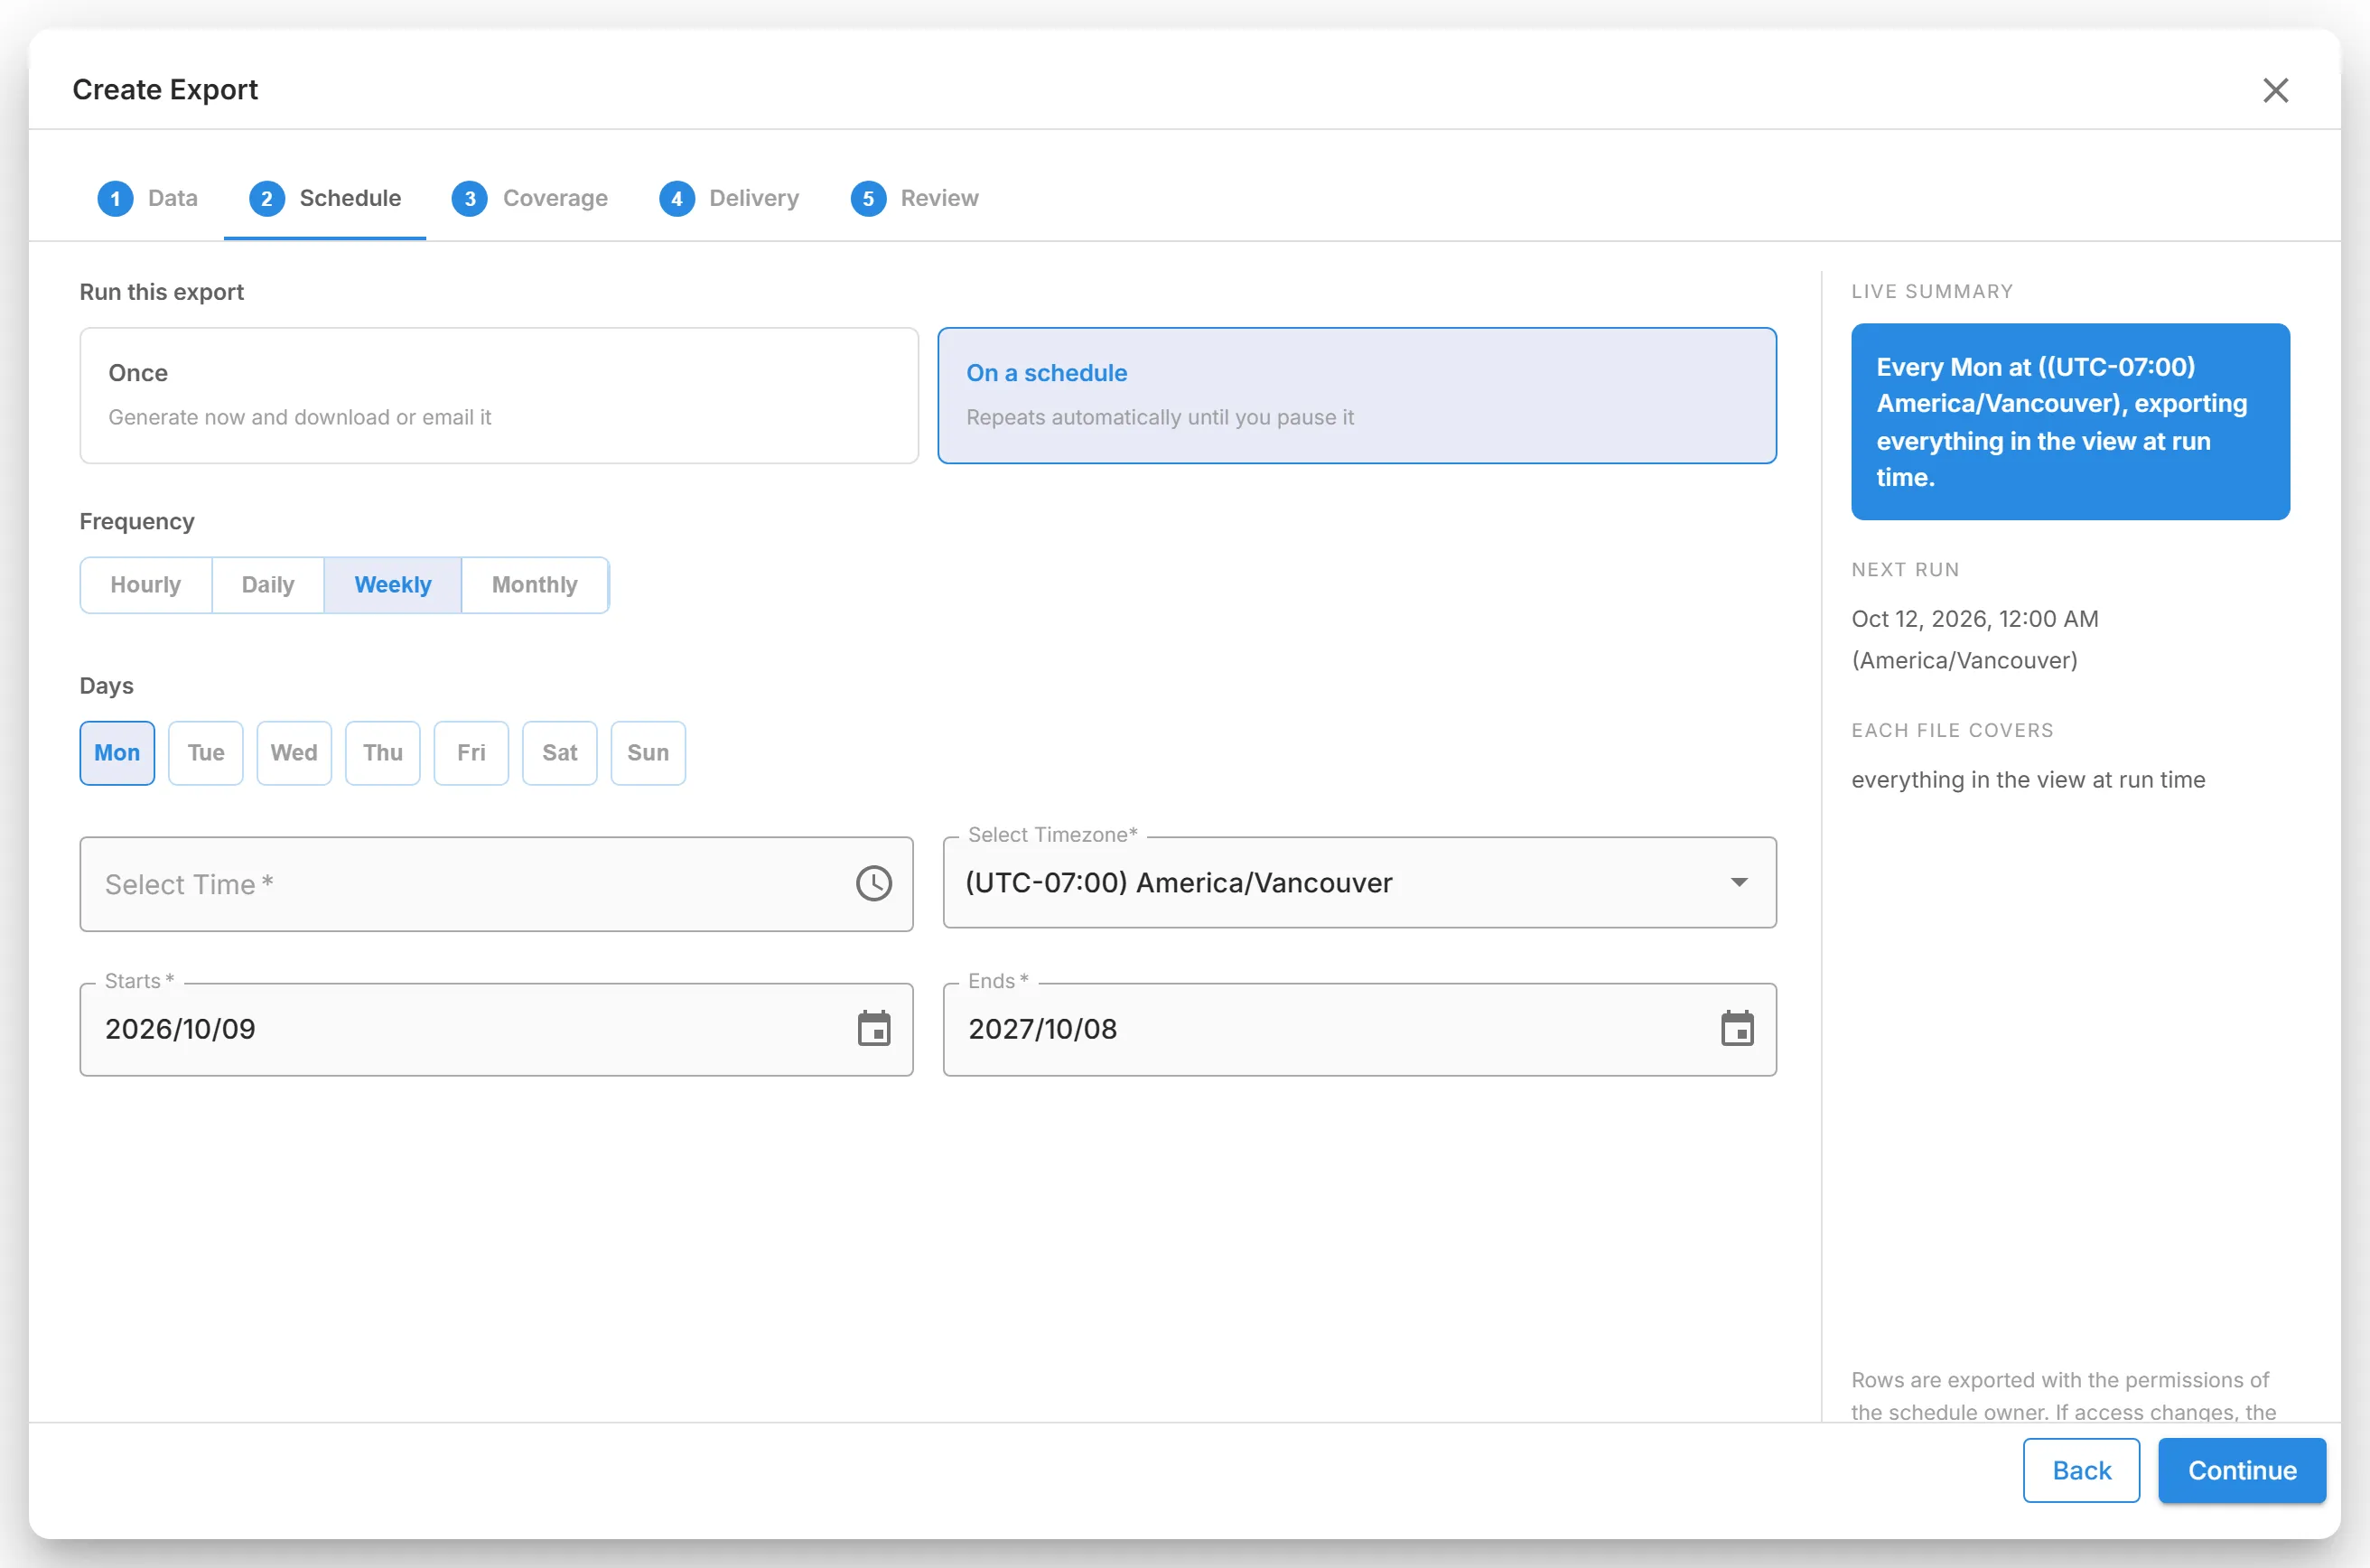
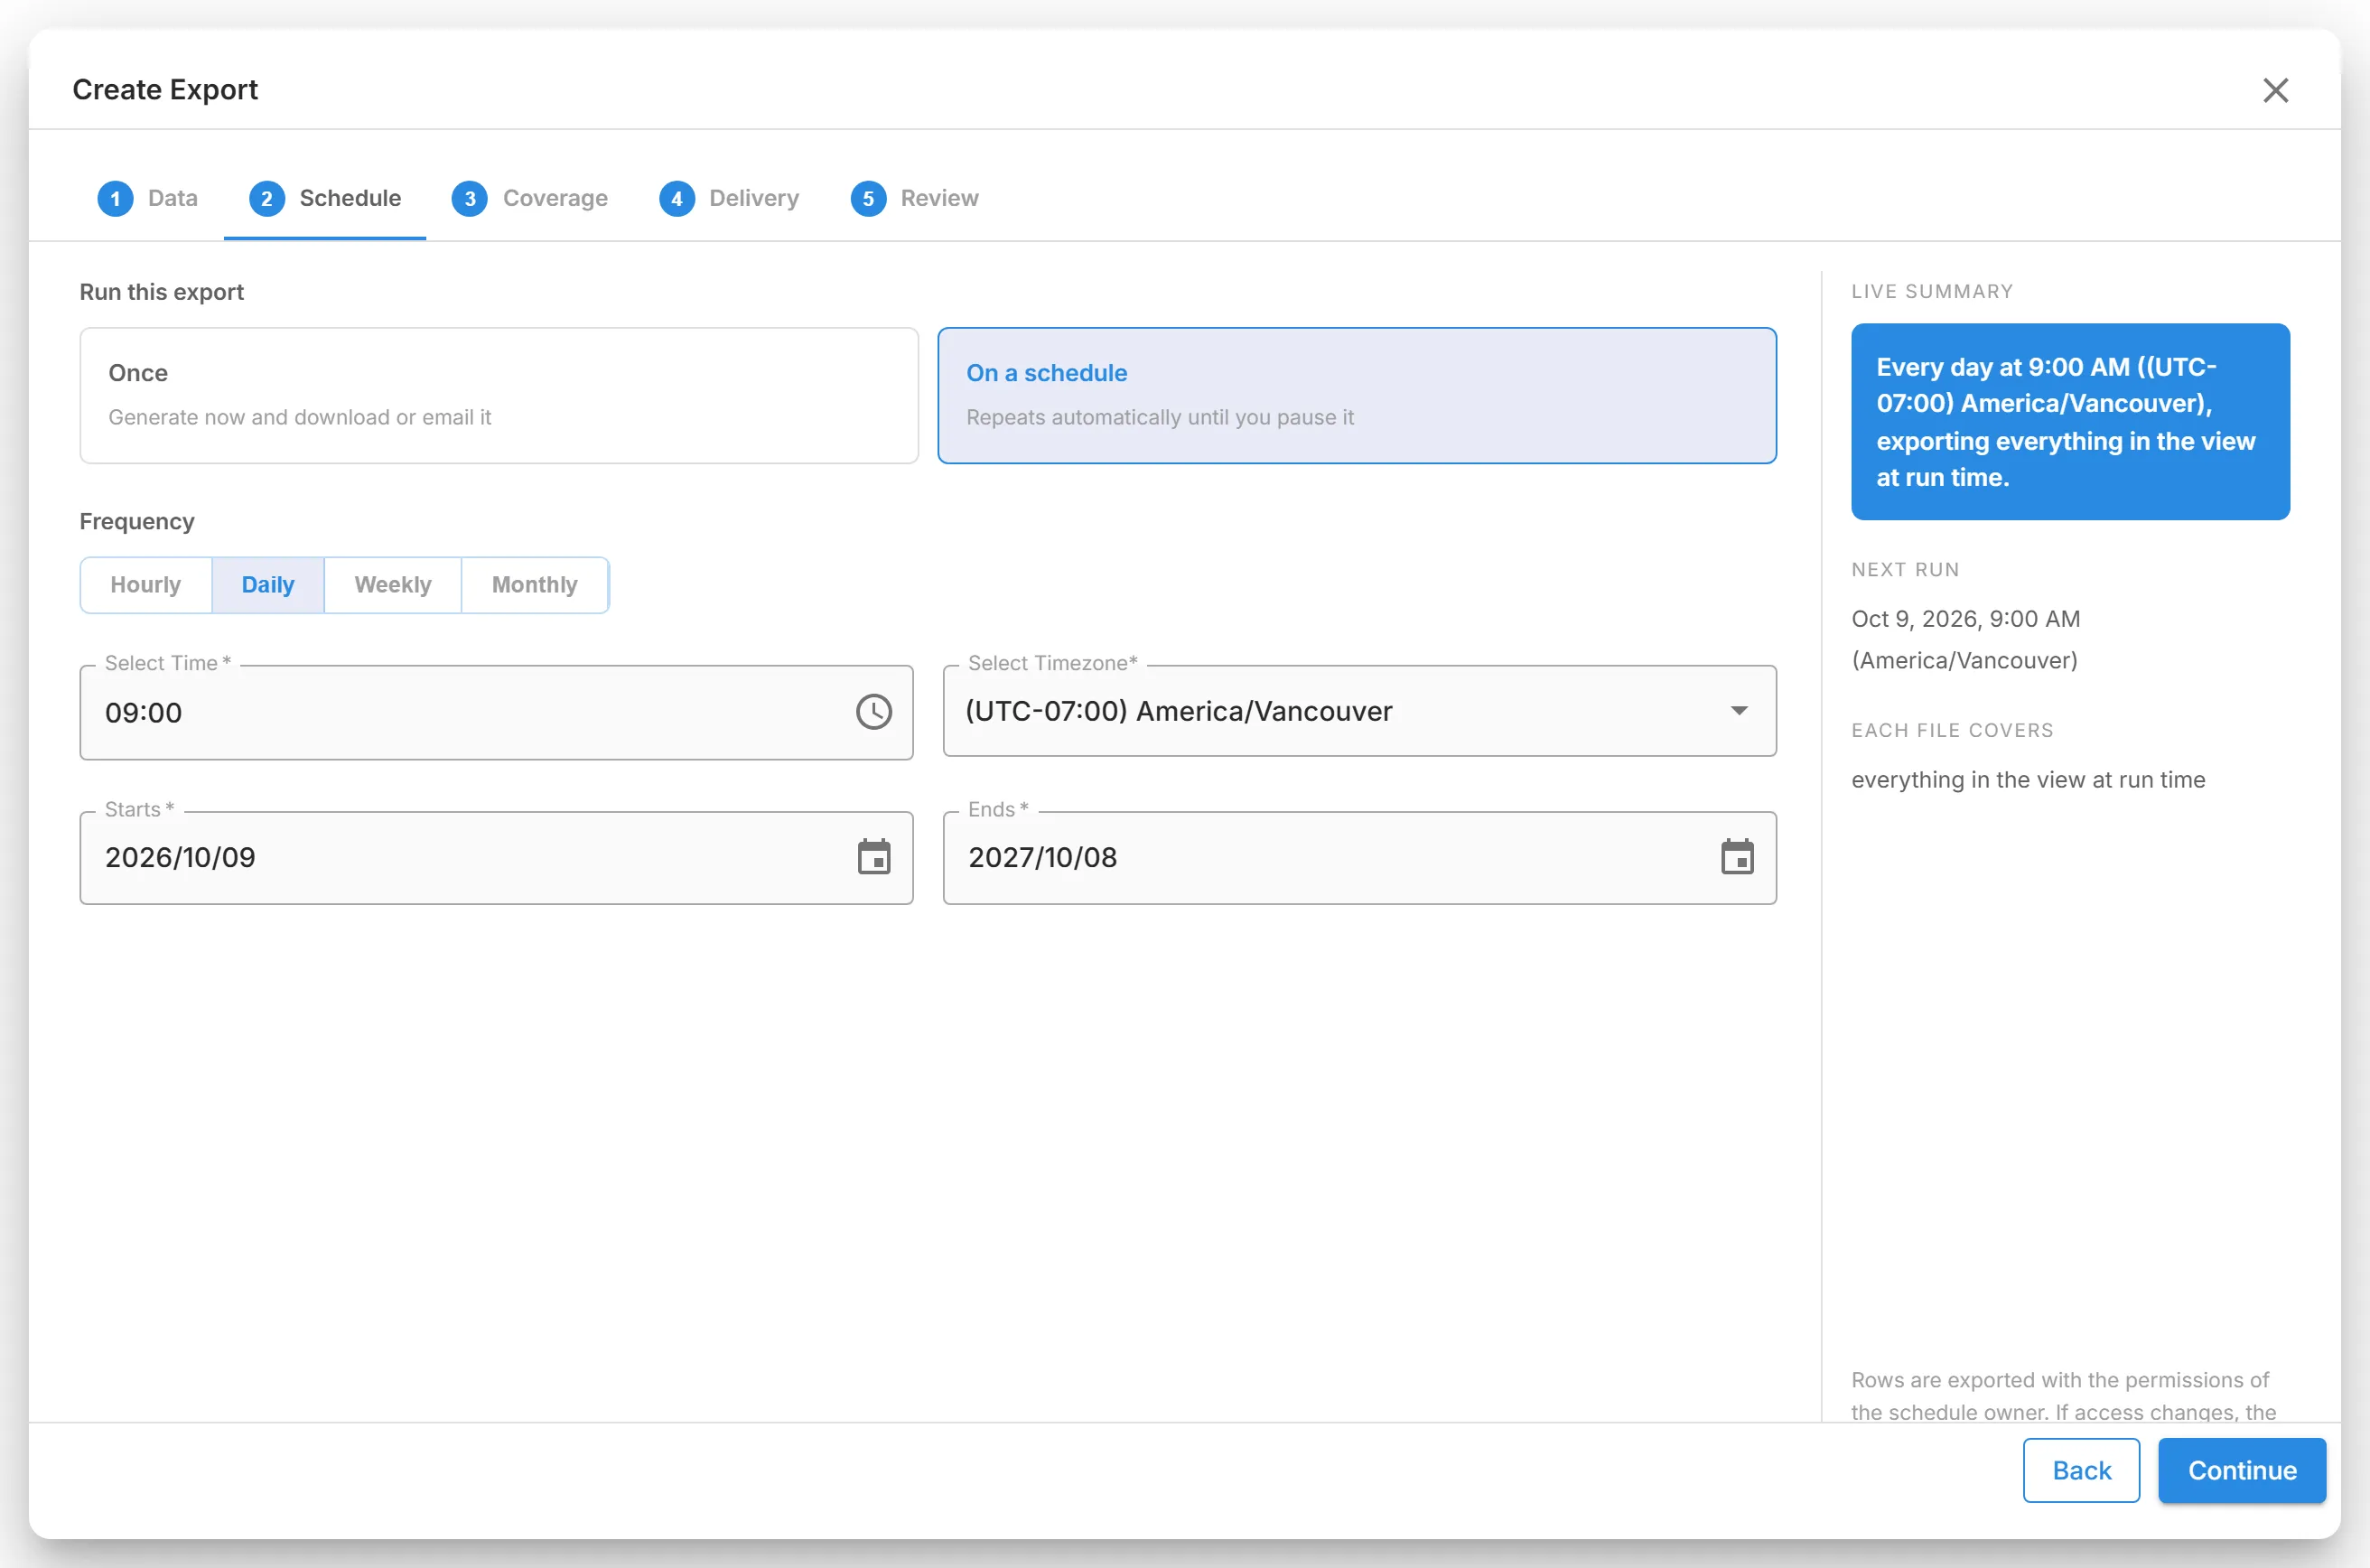
In the "Schedule" step, under "Run this export", select "On a schedule".
-
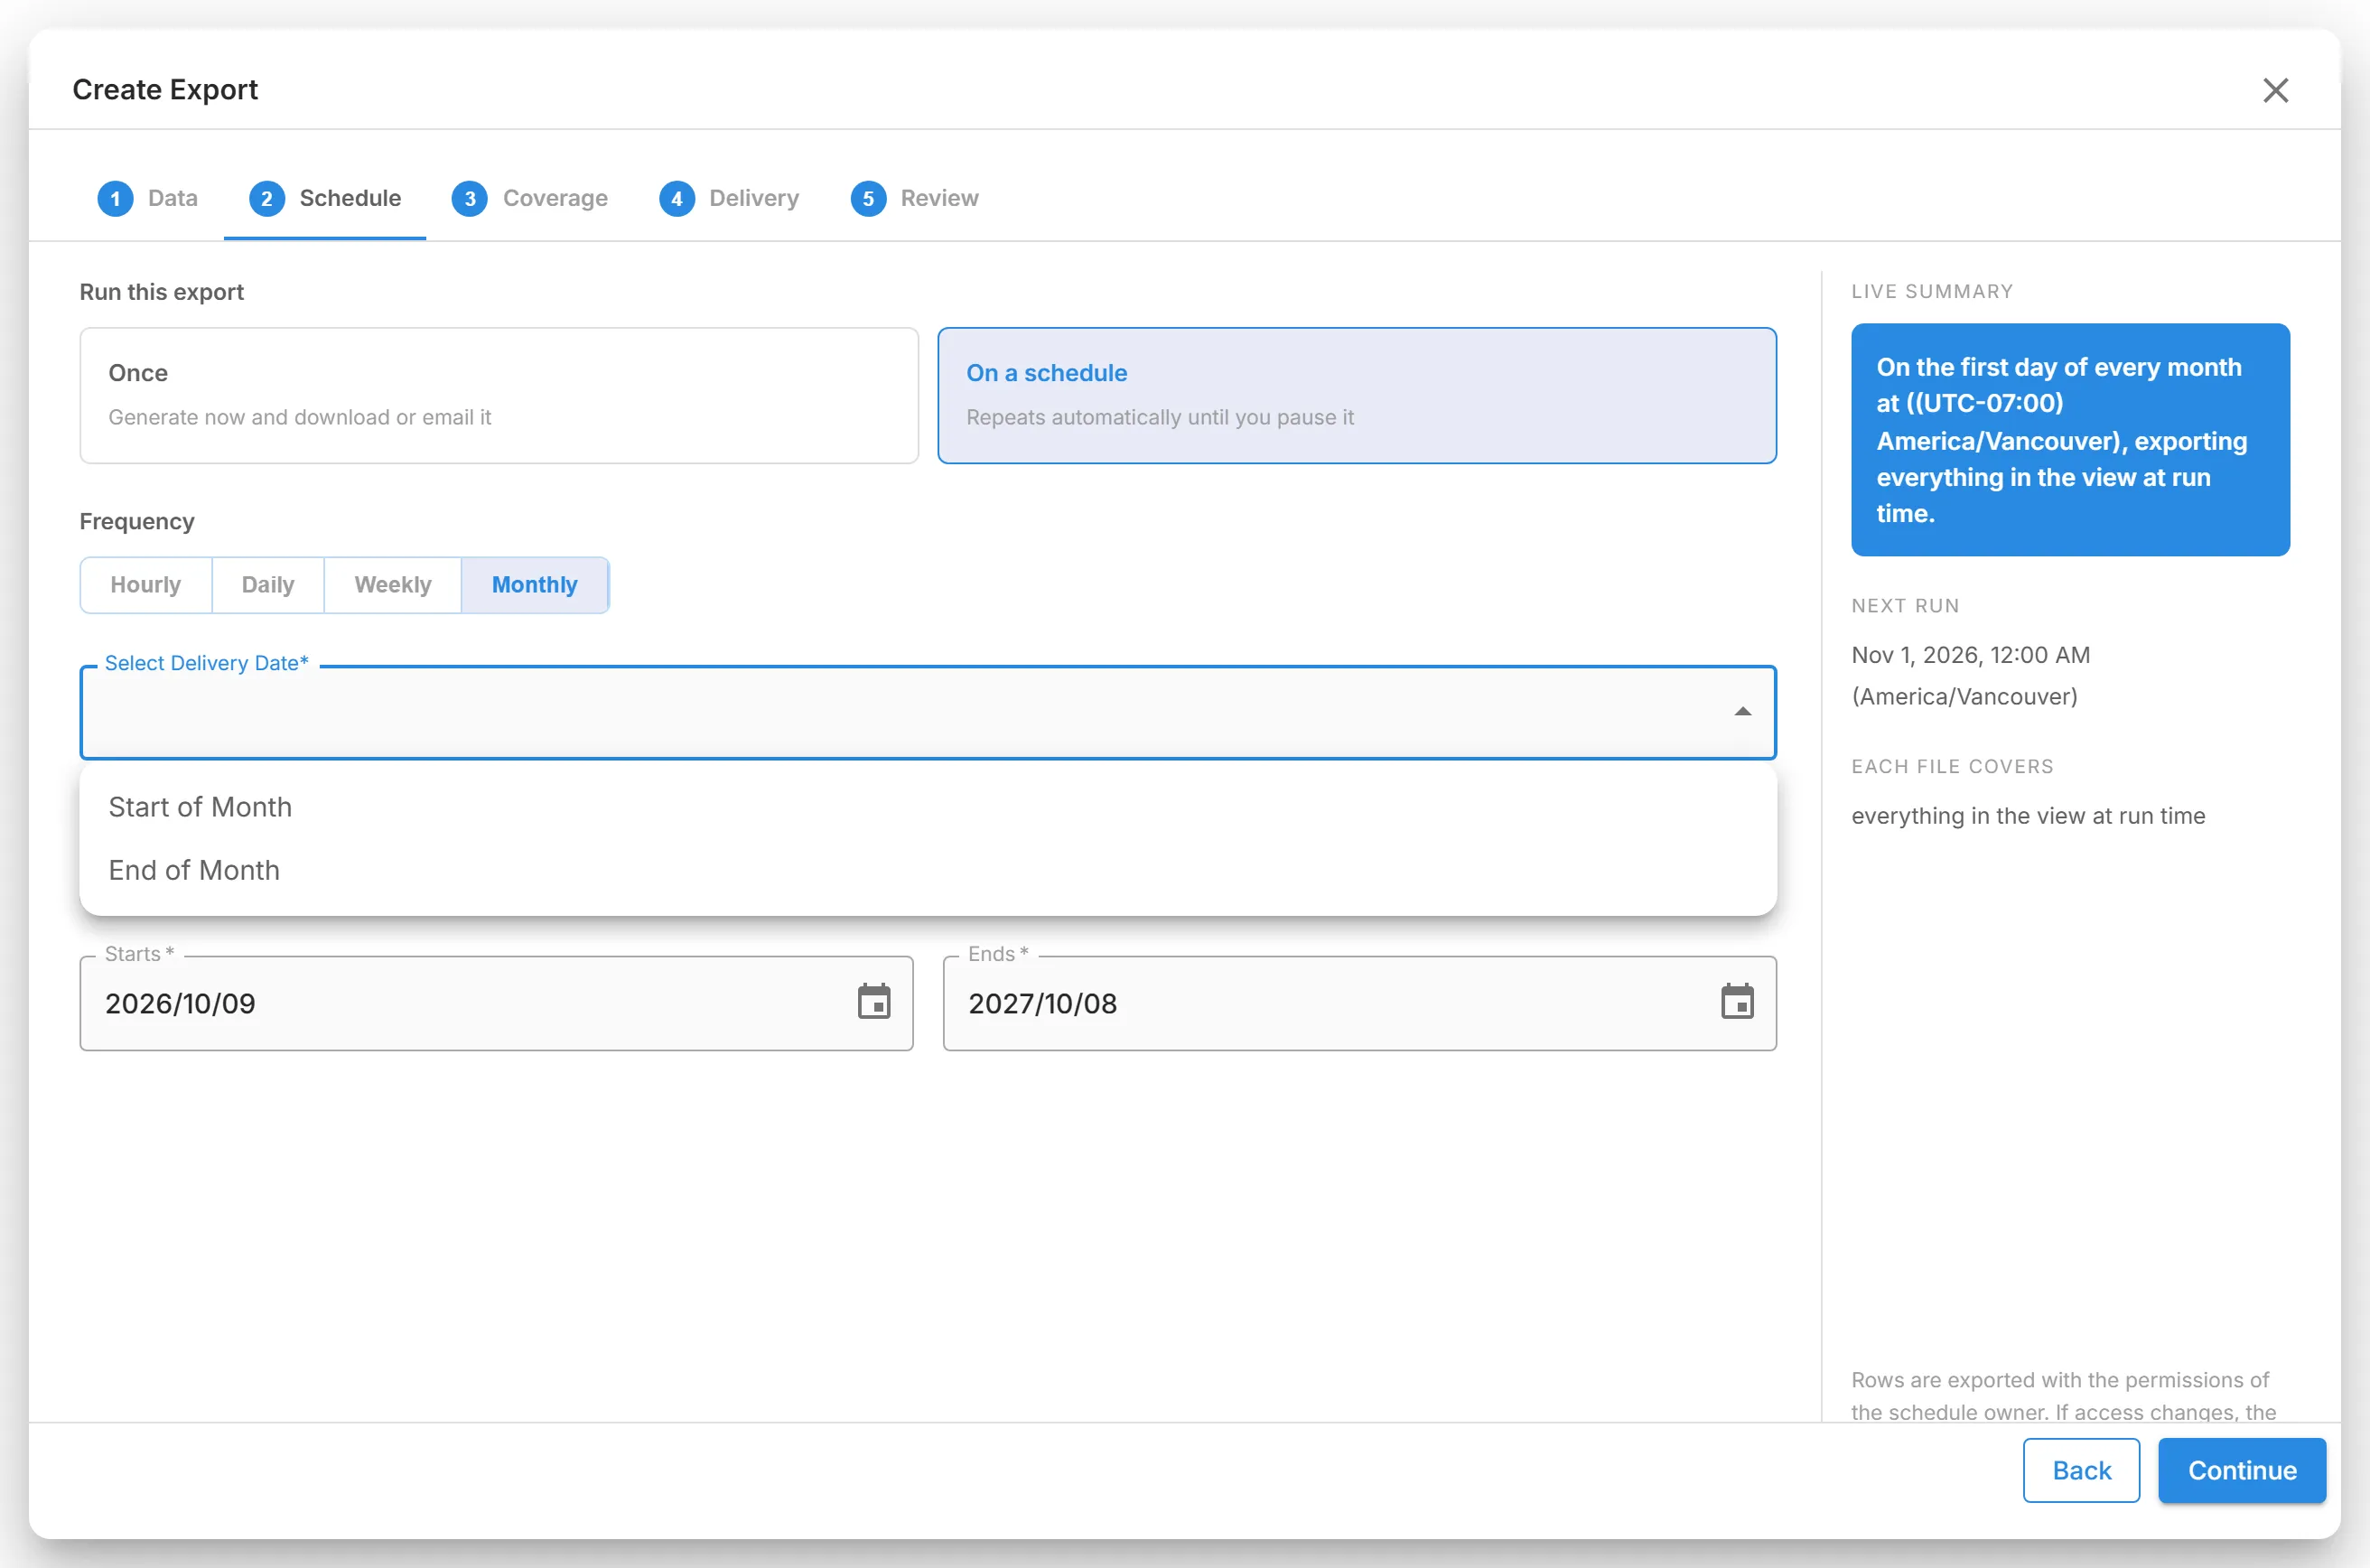
Under "Frequency", choose "Hourly", "Daily", "Weekly", or "Monthly", then:
- Hourly: choose how many hours apart in "Every": 1, 2, 3, 4, 6, 8, or 12.
- Weekly: select one or more "Days".
- Monthly: choose "Start of Month" or "End of Month" in "Select Delivery Date".
-
Except for hourly exports, choose the time in "Select Time". Choose the time zone in "Select Timezone". It starts as your browser's time zone.
-
Set "Starts" and "Ends". The schedule can start tomorrow at the earliest and end up to one year from today.
-
In the "Coverage" step, choose what each file contains. See Coverage.
-
In the "Delivery" step, choose where the files go and the file name, as for a one-time export. Then, under "When a run finds no new rows", choose "Send an empty file" or "Skip the run".
-
In the "Review" step, check the summary and select "Save Schedule".
The schedule appears in "Reports" → "Scheduled Exports", and each run appears in "Generated Exports".
Coverage
Section titled “Coverage”The "Coverage" step decides which rows each file holds:
-
"Snapshot: everything in the view at run time": every matching row, whenever it was found. Each file is complete, and files grow over time.
-
"Time window: only rows first seen in a period": only the rows first seen in the window you choose: "Previous hour", "Previous 24 hours", "Previous 7 days", "Previous calendar week", "Previous 30 days", or "Previous calendar month". The step shows the period the next file would cover. This option is available only on tables that have a date to measure it by, such as "First Seen" on Findings.