
Addition of Third Party Questionnaire
Build your own questionnaire when the standard templates in the TPRM Questionnaire Library do not fit your compliance or business requirements. You build it in the form builder, preview it as the third party will see it, and optionally configure how its answers are scored.
Navigation path
Section titled “Navigation path”- In the sidebar, select Third Party Risk → Questionnaires.
- Select the "Templates" tab.
Steps to create a questionnaire template
Section titled “Steps to create a questionnaire template”-
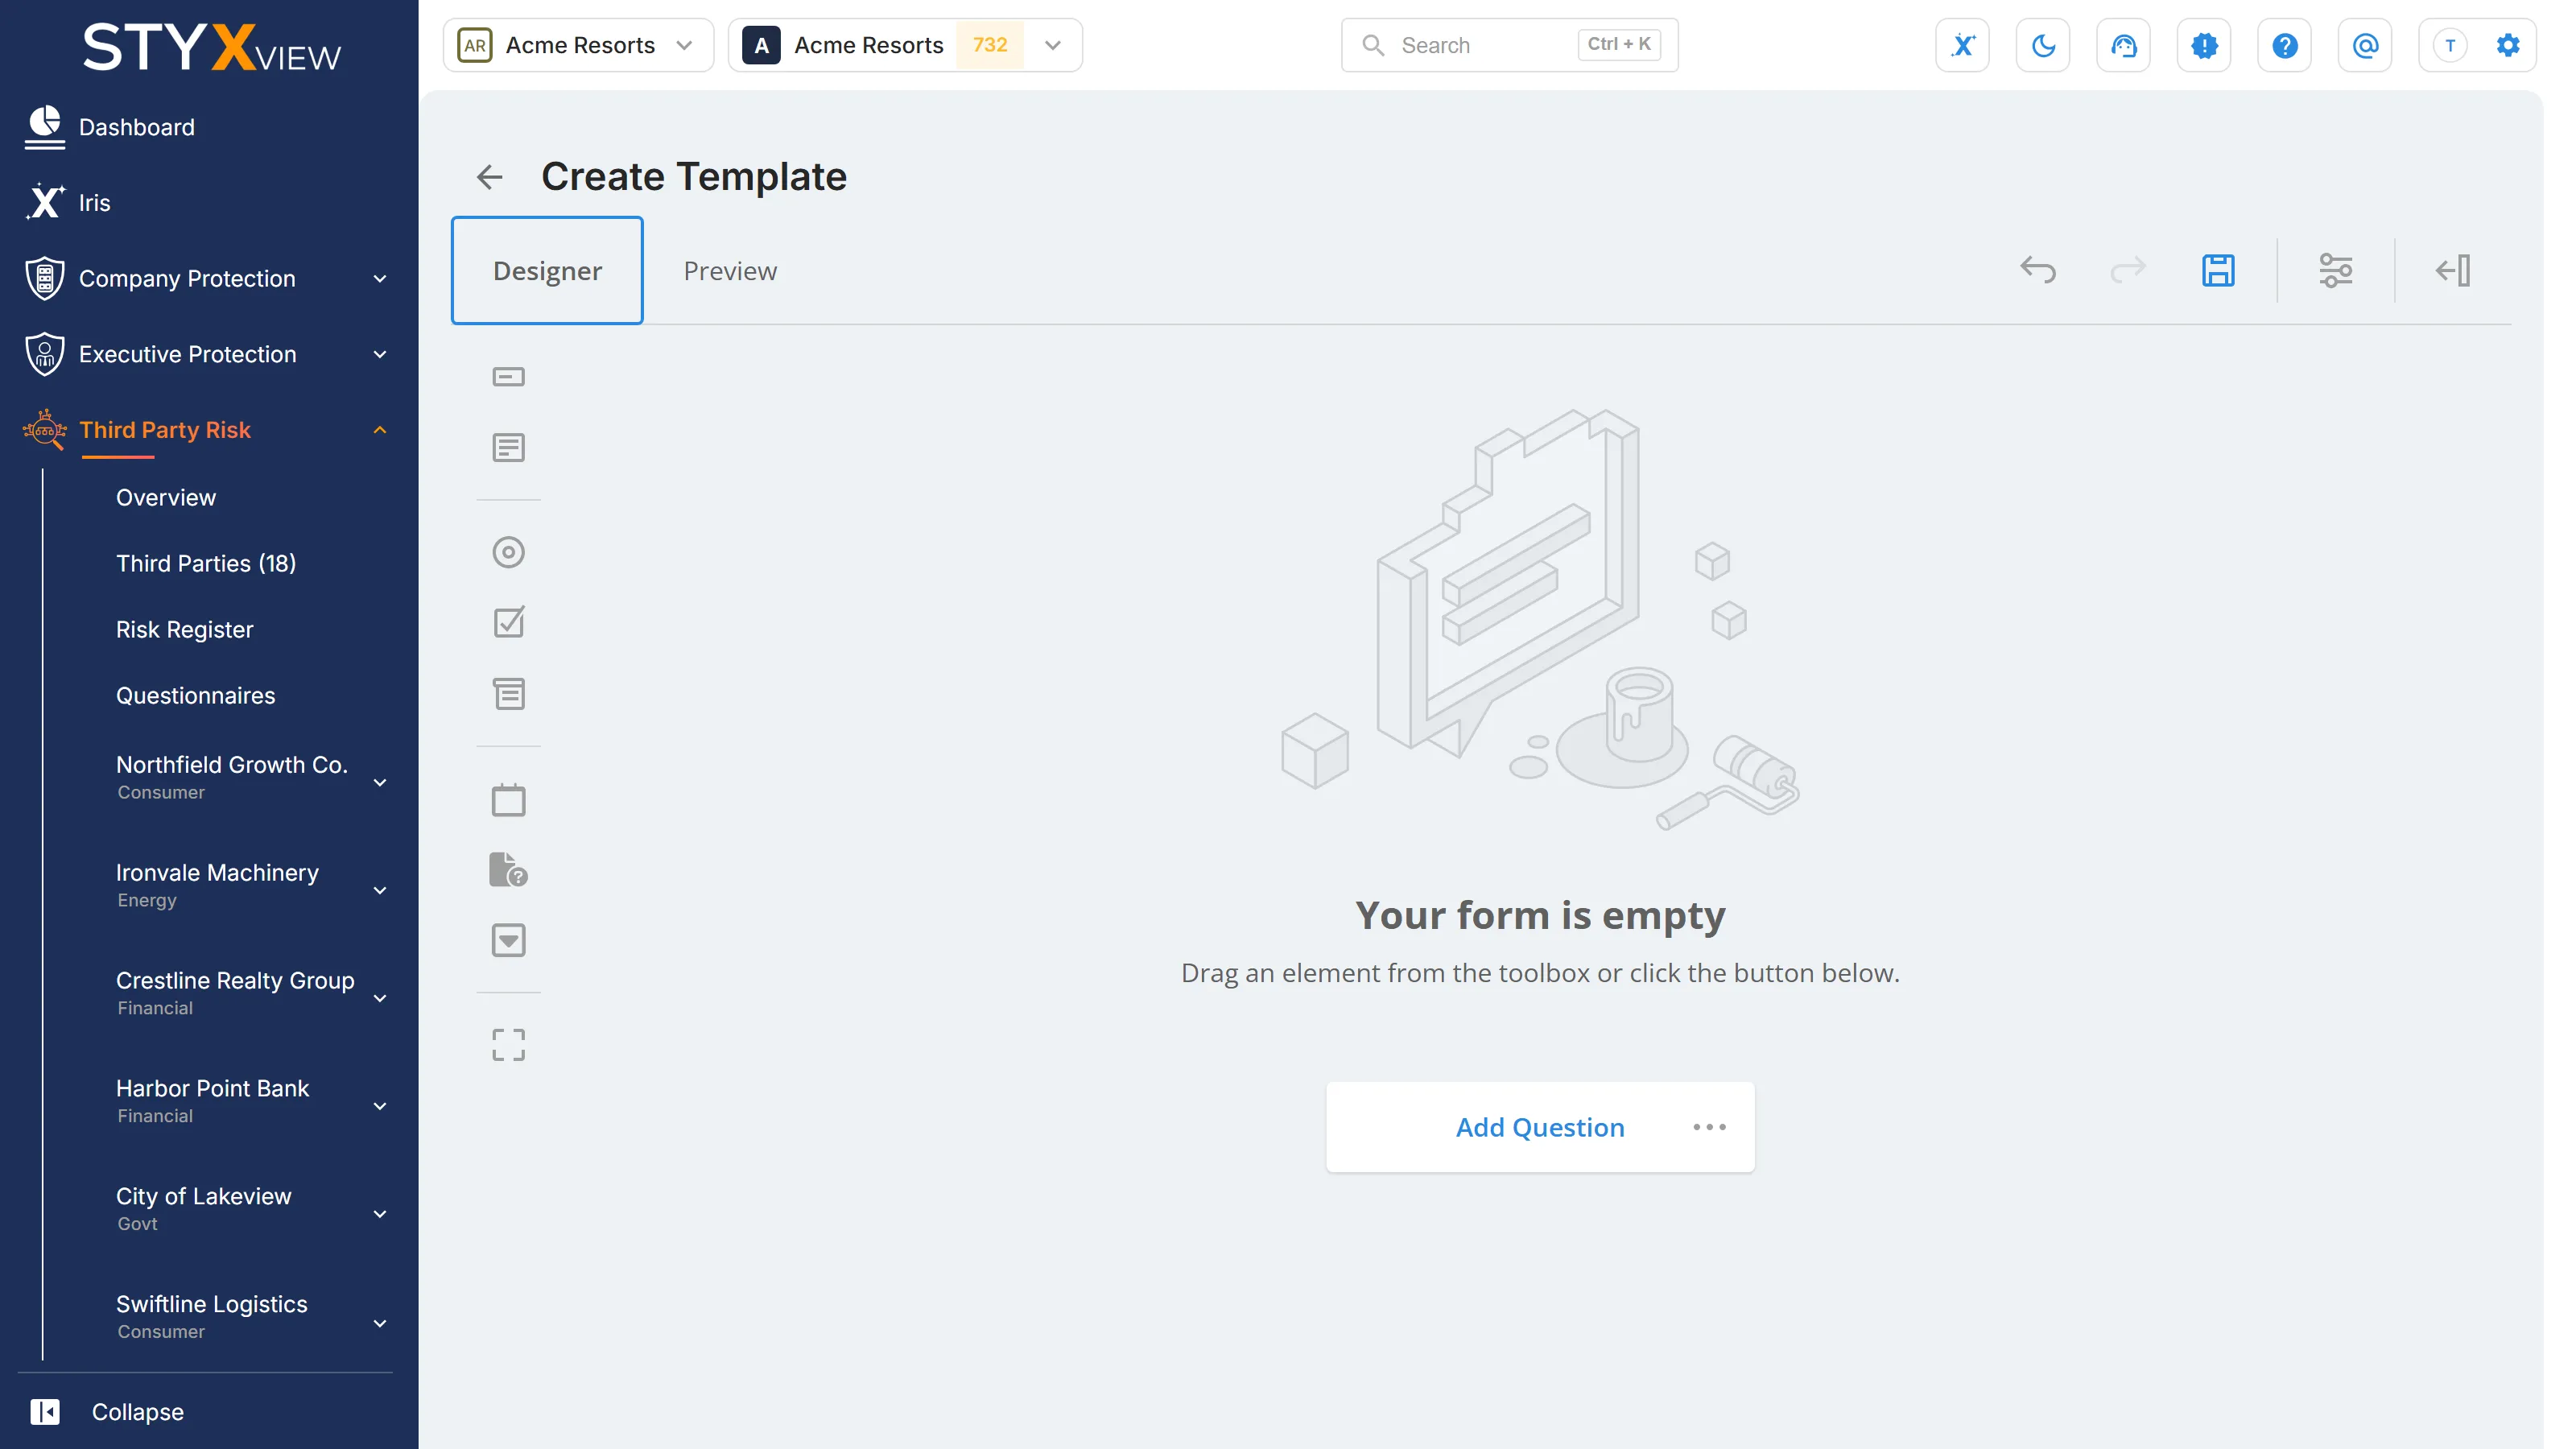
Select "Create Template". The form builder opens on the "Create Template" page.

-
Build the questionnaire on the "Designer" tab, then check it on the "Preview" tab. Both are described below.
-
Save the template and enable it. See Finalising the template.
Designer tab
Section titled “Designer tab”The "Designer" tab is where you build the questionnaire.
-
Title and sections. Enter the questionnaire's title at the top. Each page of the questionnaire is a section, and the third party works through the sections one at a time. When a template is scored, sections are its top-level categories.
-
Toolbox (left). Drag a question type onto the canvas, or select it to add it. The types are:
Type Use it for "Single-Line Input" A short text answer. "Multiline" A longer text answer. "Radio Button Group" One answer from a list. "Dropdown" One answer from a drop-down list. "Checkboxes" Several answers from a list. "Date" A date. "Text with Upload" A text answer with an optional supporting file. "Dropdown with Upload" An answer from a drop-down list, with a text answer and an optional supporting file. "Panel" A container that groups related questions into a sub-section. A question added outside a panel is placed in a panel of its own.
-
Canvas (centre). Select an element to edit its title, description, and answer choices in place. Drag questions to reorder them.
-
Settings. Select the settings icon in the toolbar at the top right to open the settings panel for the selected element. Use it for options such as making a question required, validation rules, numbering, and conditions that show or hide a question based on an earlier answer.
New choice questions start with the answers of StyxView's default answer set, so that they can be scored. To replace them with another set, open the question's menu and select "Apply Answer Set". See Answer sets.
Preview tab
Section titled “Preview tab”The "Preview" tab, next to "Designer", shows the questionnaire as the third party will see it.
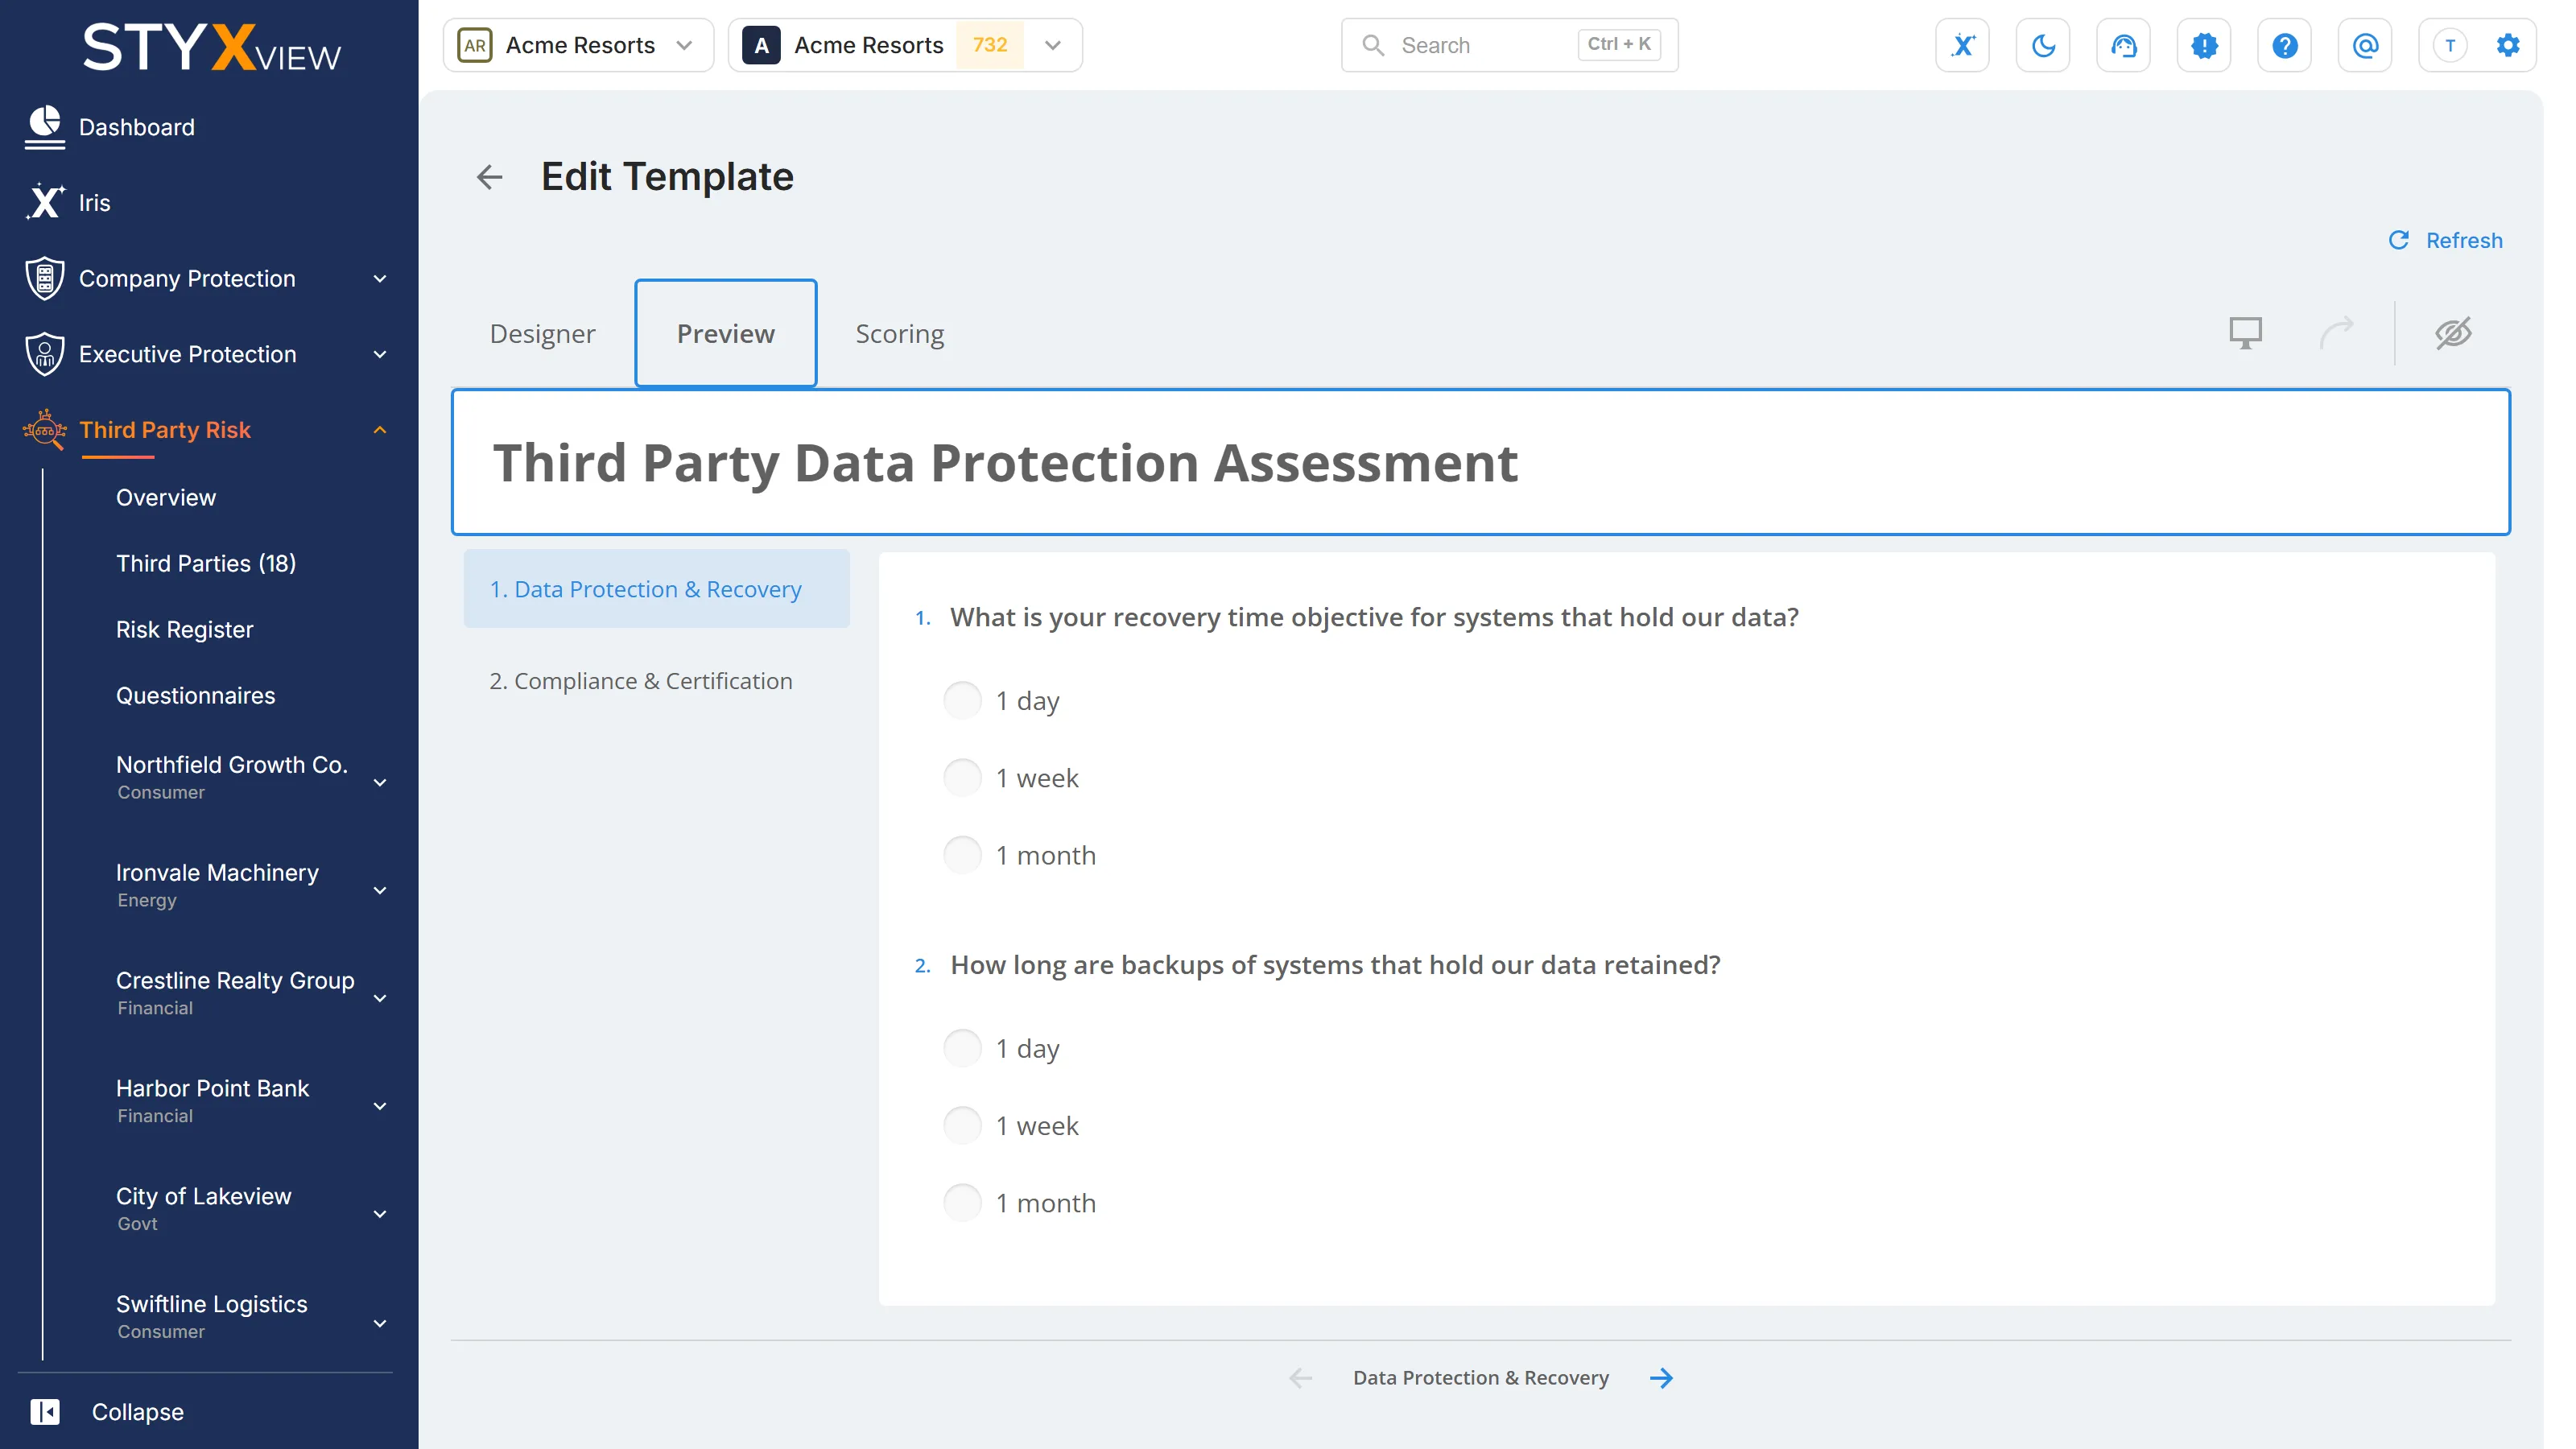
- Answer questions, select options, and move between sections to test that everything works as intended.
- Check the layout and wording before you save and send the template.
Finalising the template
Section titled “Finalising the template”When the questionnaire is ready, select the save icon in the toolbar at the top right. StyxView saves the template and returns you to the "Templates" tab.

Verifying the new template
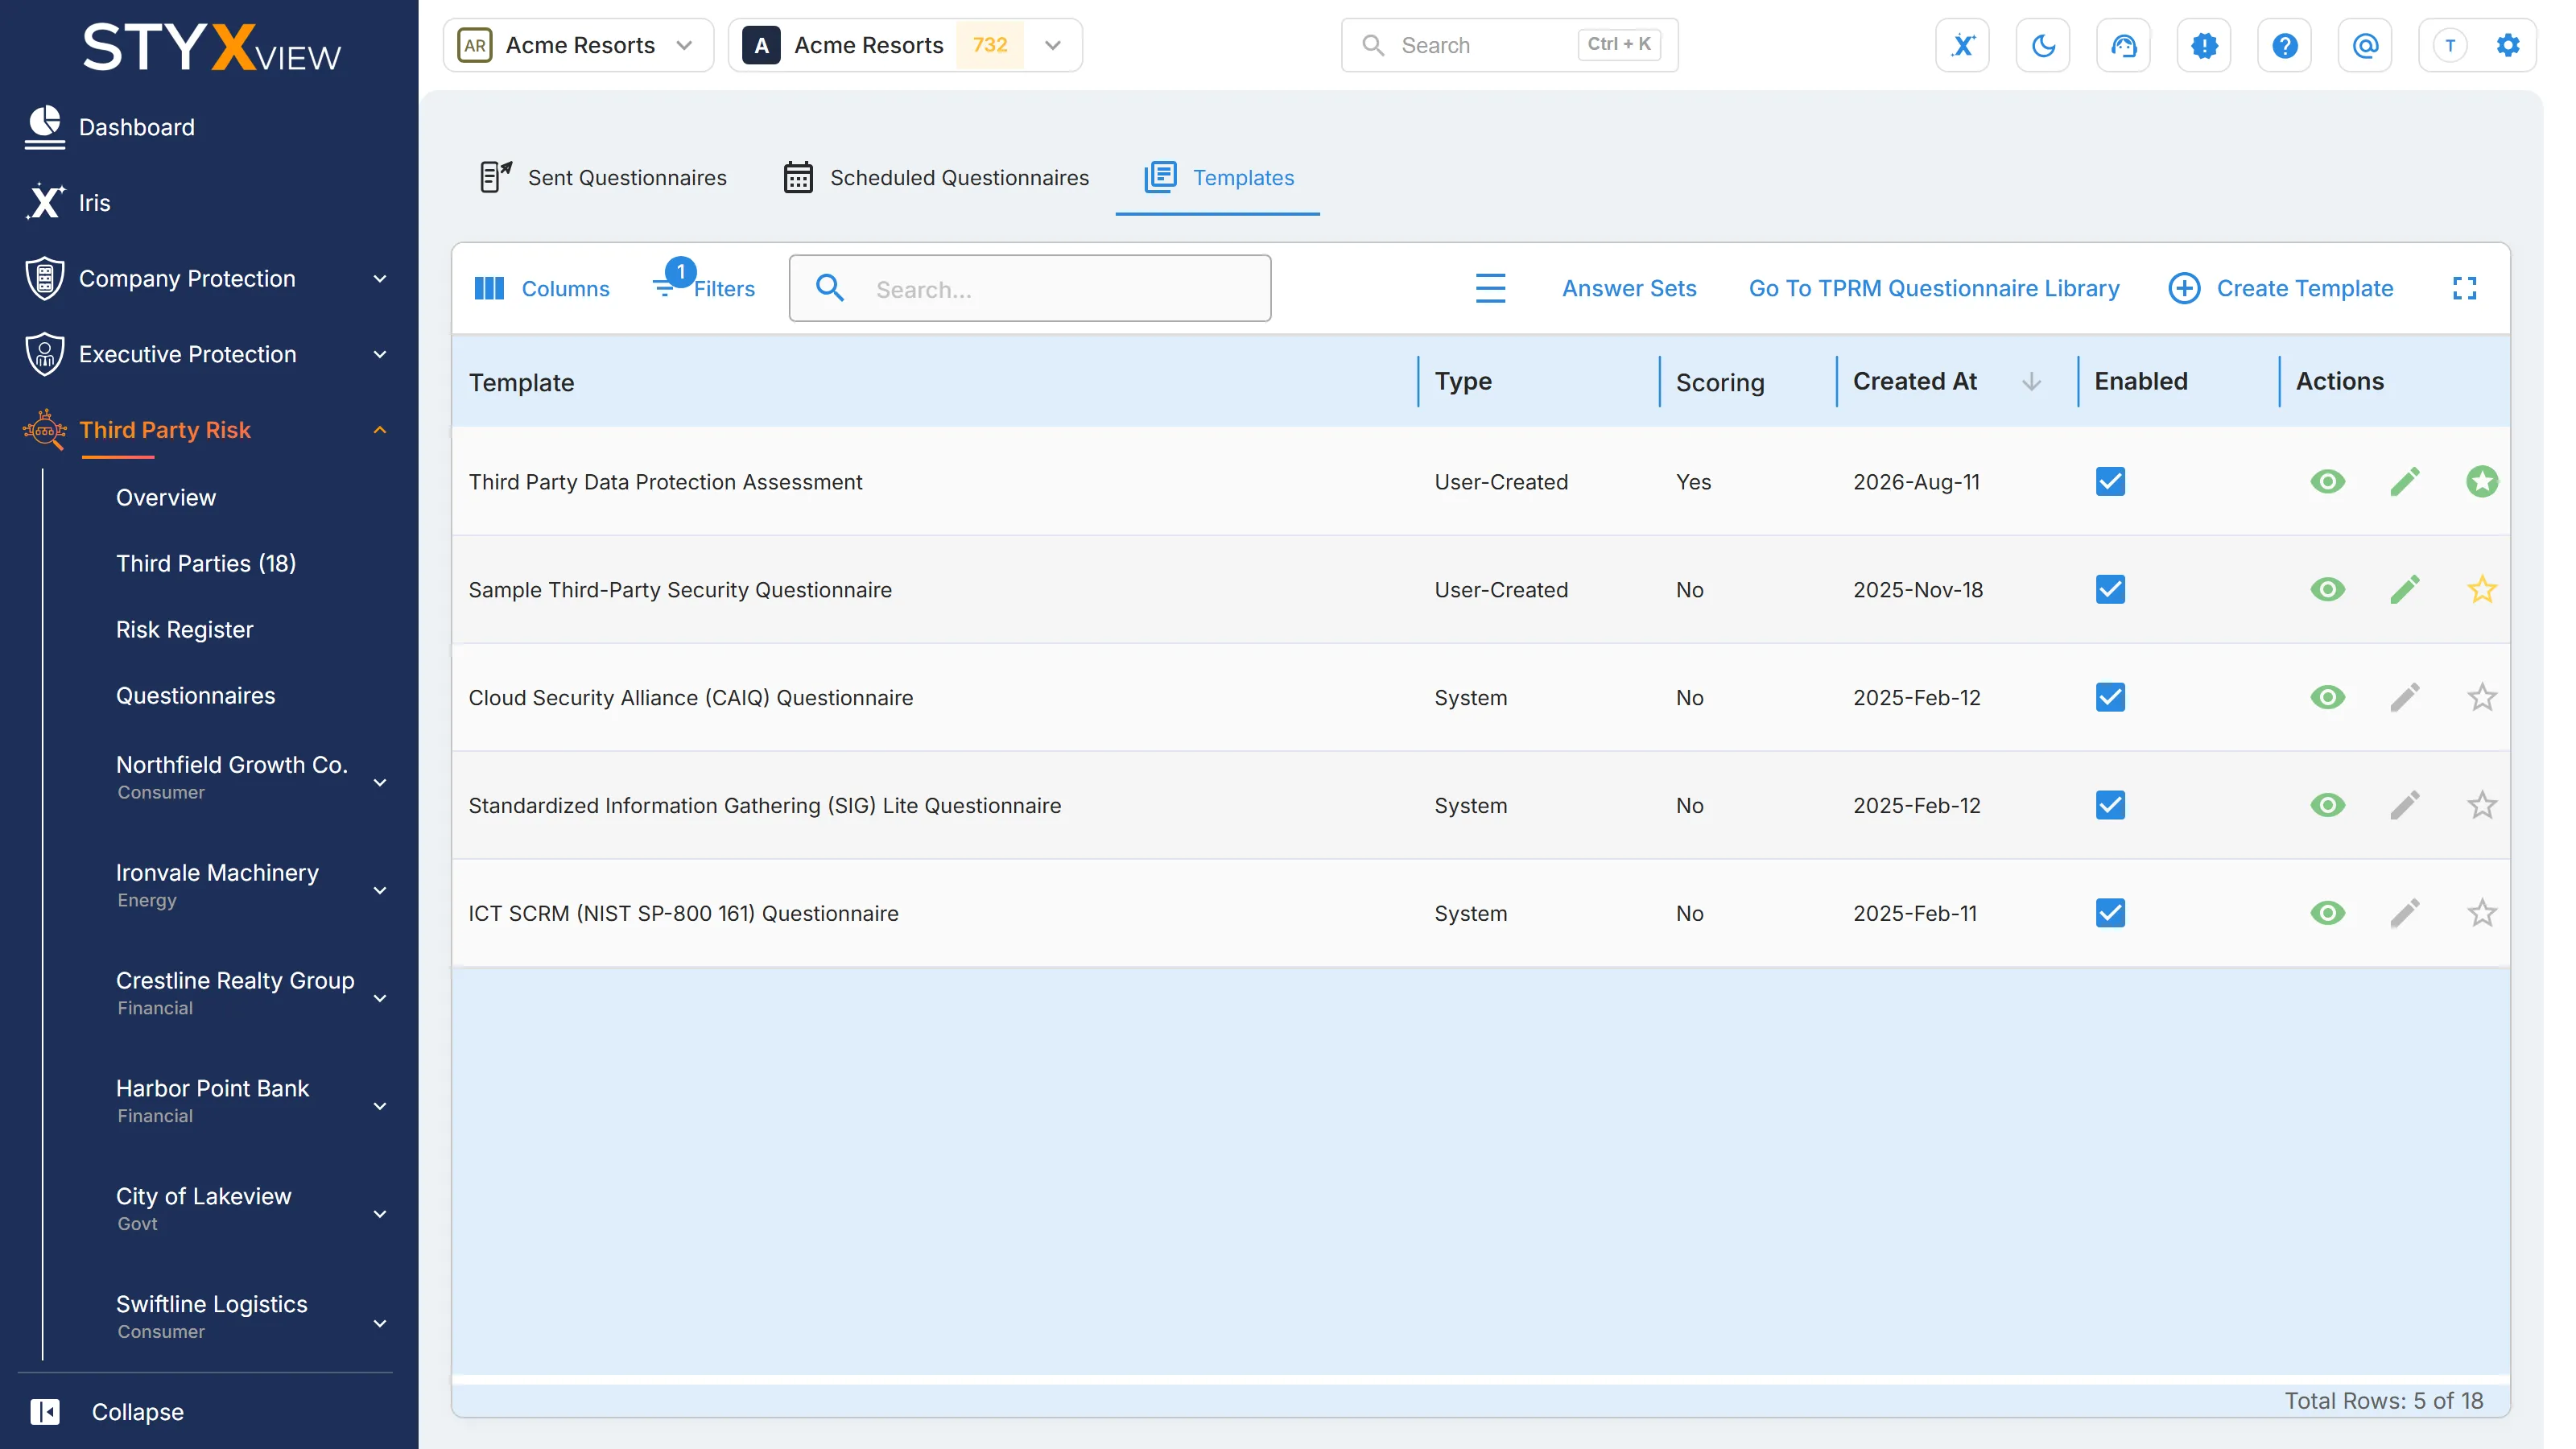
Section titled “Verifying the new template”The new template appears on the "Templates" tab with the type "User-Created". To change it later, select "Edit Template".
Enabling the template for use
Section titled “Enabling the template for use”A new template starts disabled. Select its "Enabled" checkbox on the "Templates" tab. Only enabled templates are offered in "Questionnaire Template" when you send a questionnaire. See Sending Out a Questionnaire.
Scoring a template
Section titled “Scoring a template”Scoring turns a third party's answers into a questionnaire risk score from 0 to 1000, where 0 means every scored control is fully met. The score feeds the third party's Combined Risk Score. Scoring is optional, and only user-created templates can be scored.
Scoring is configured on the "Scoring" tab of a saved template. To open it, select the "Template Scoring" star on the "Templates" tab, or select "Edit Template" and then the "Scoring" tab. Saving on this tab saves the template first, then the scoring configuration as a new version.
-
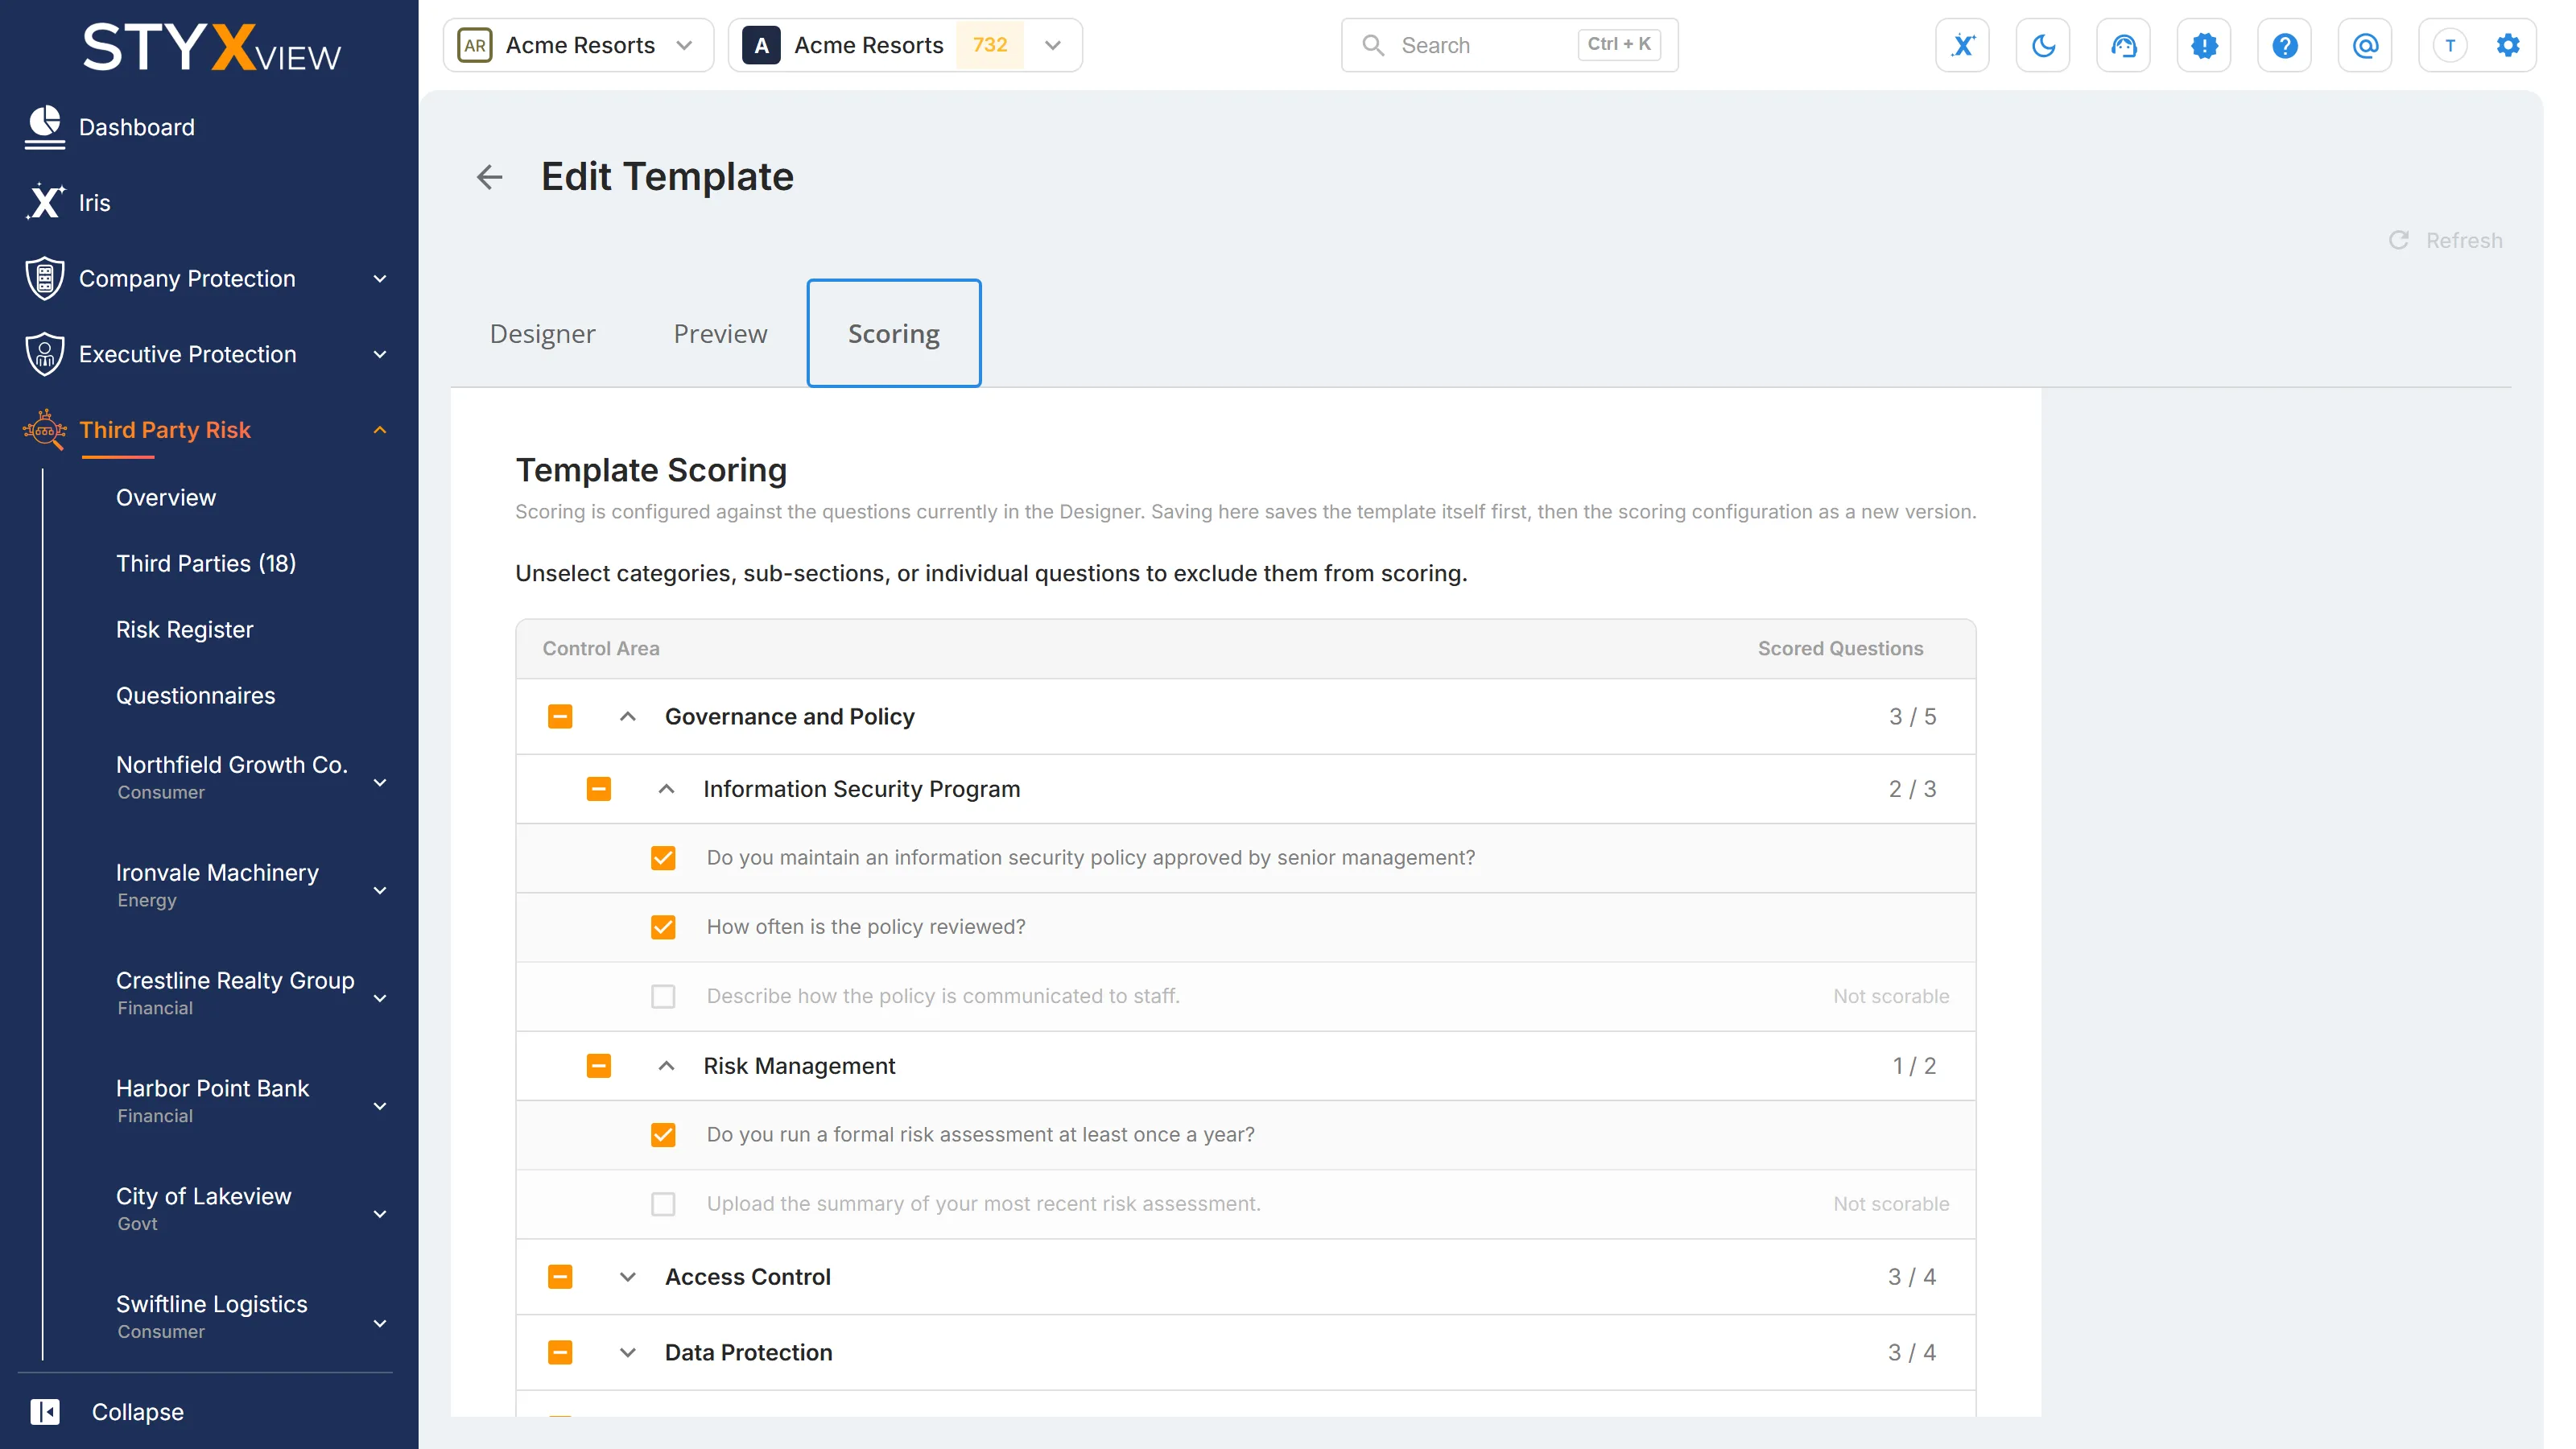
Choose what is scored. All sections, sub-sections, and questions are selected. Clear the ones to leave out of the score. Only questions with a fixed list of answers ("Radio Button Group", "Dropdown", "Checkboxes", and "Dropdown with Upload") can be scored; other types are marked "Not scorable". Select "Next Step".
-
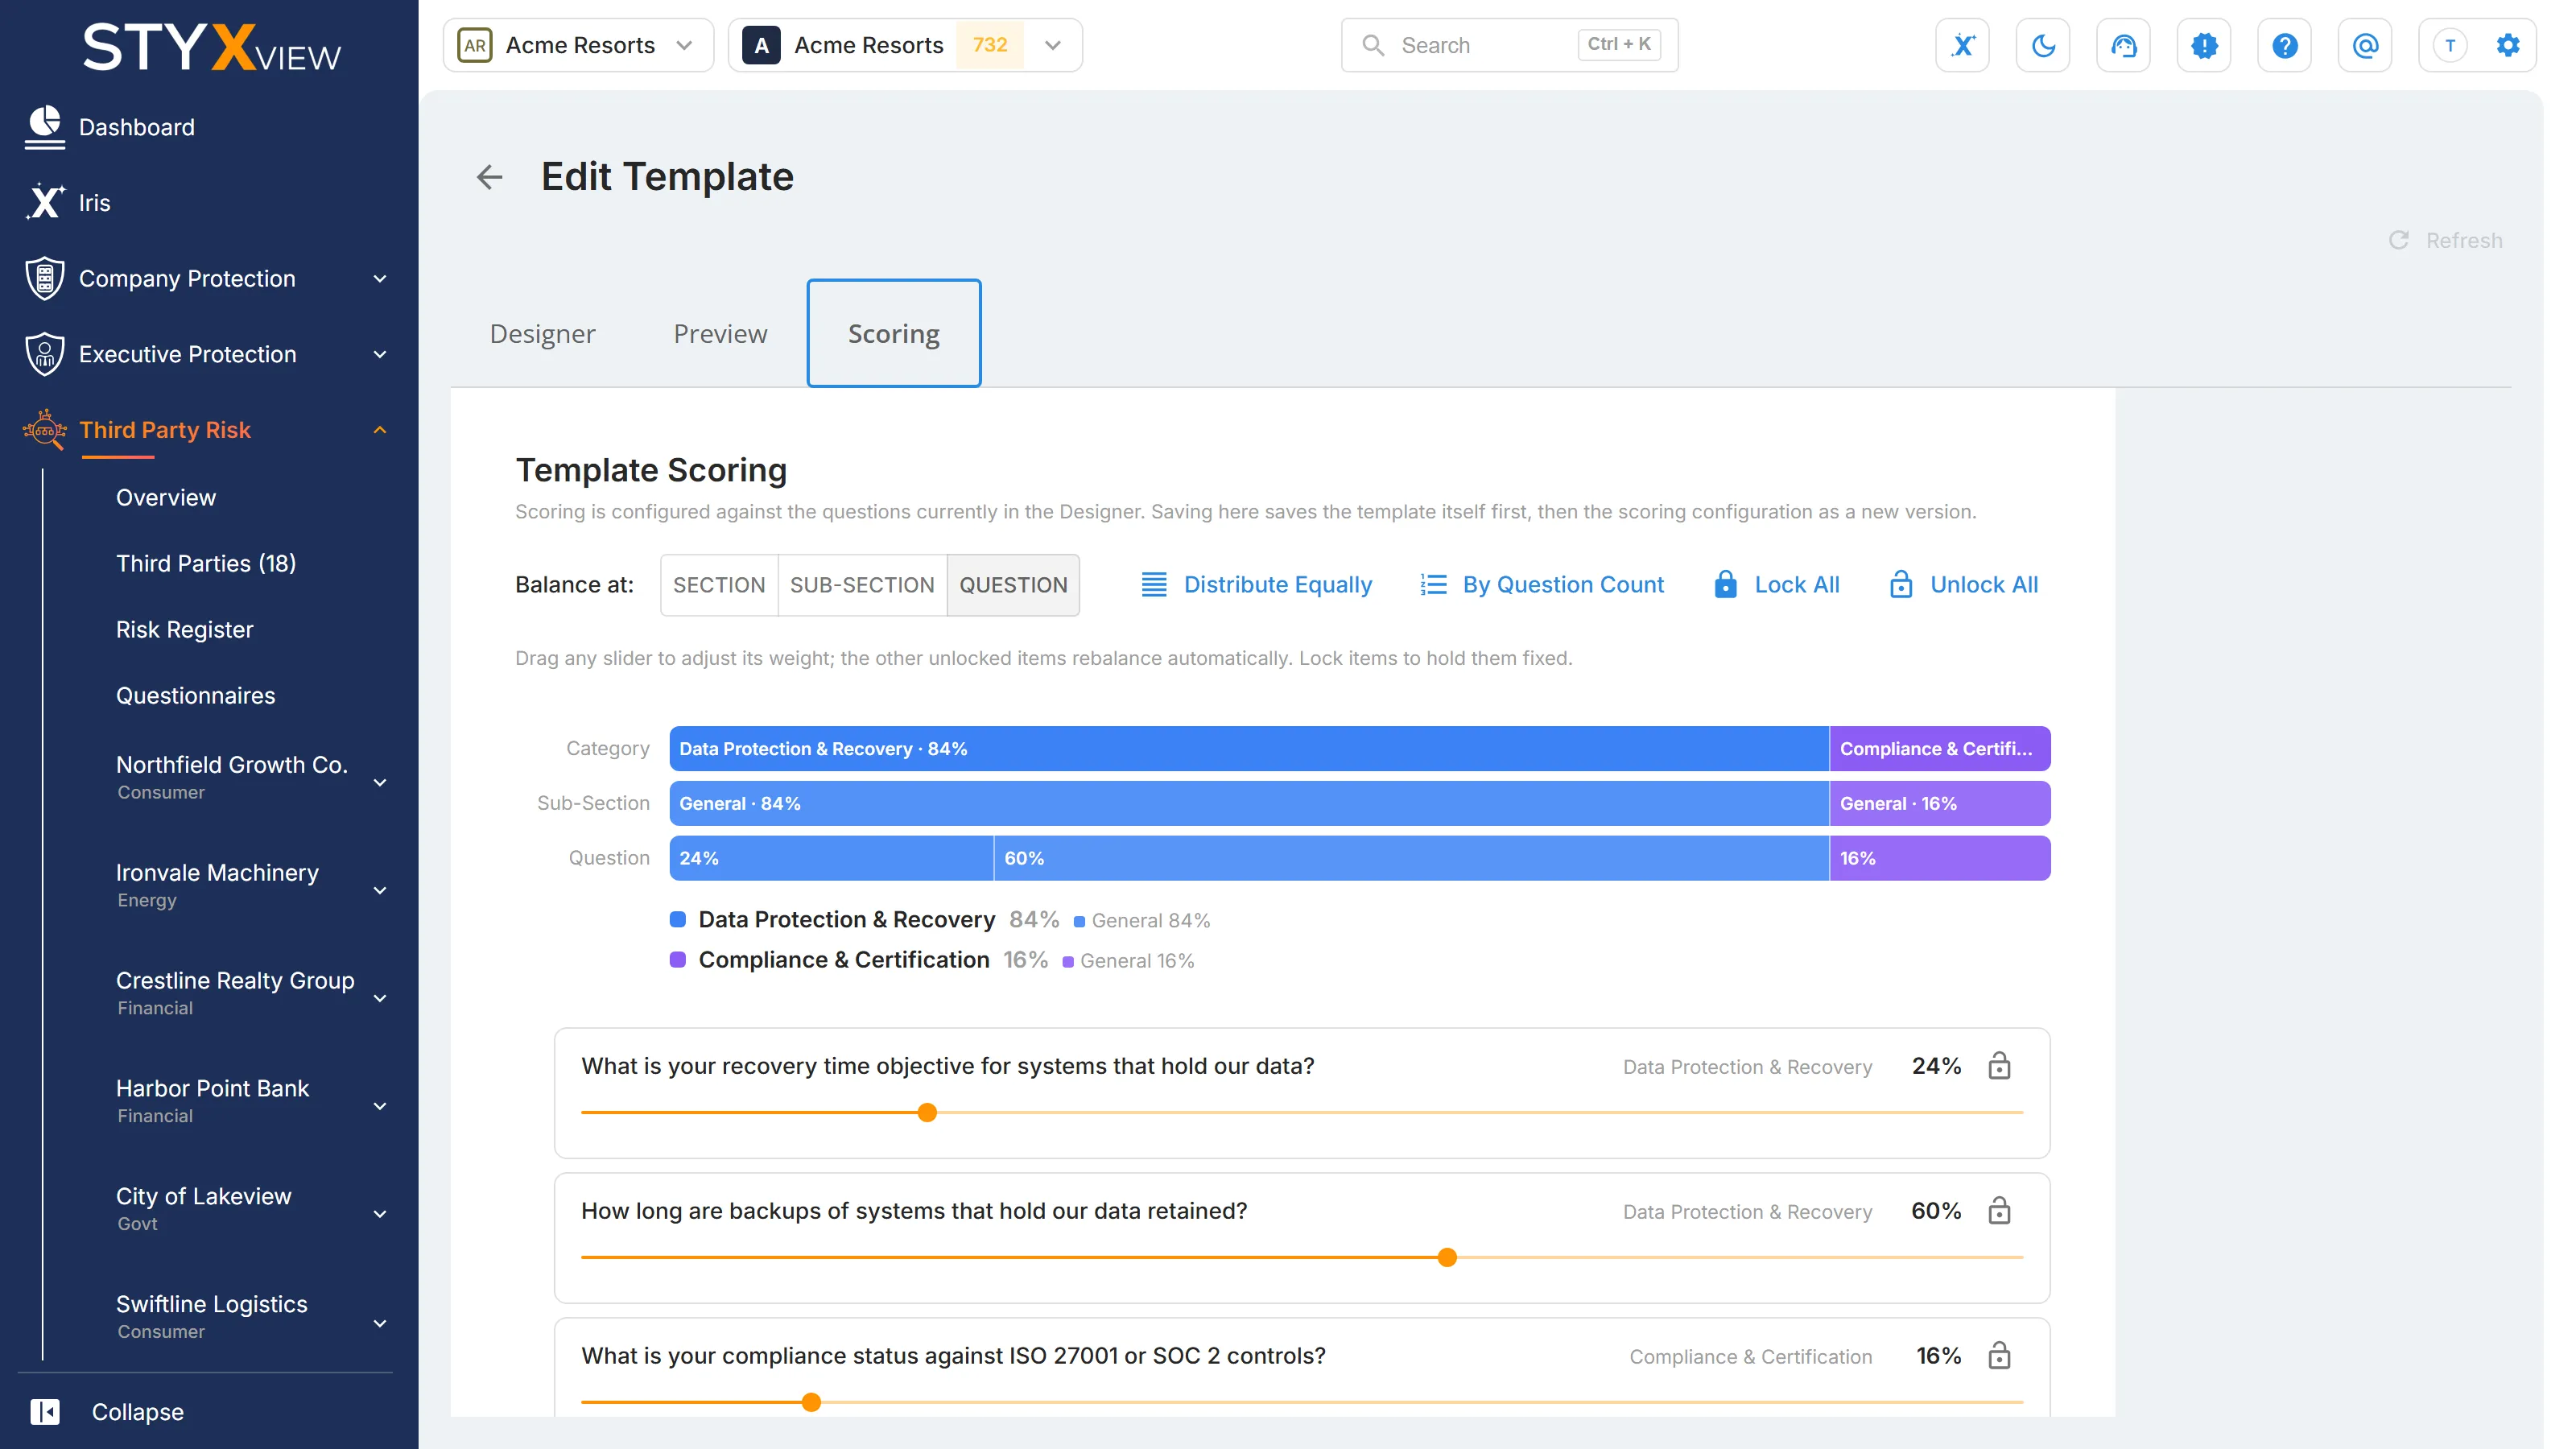
Balance the weights. Under "Balance at:", choose "Section", "Sub-Section", or "Question", then set each weight. Use "Distribute Equally" or "By Question Count" to fill them in, and lock any weight you want to keep while you adjust the others. The total must reach 100%. Select "Next Step".
-
Map the answers. For each scored question, pick the "Answer Set" and its version that decide how much credit each answer earns. To change the credit for one answer on one question only, select the answer and set a "Compliance credit (%)", or mark it as not applicable to exclude the question when that answer is chosen. Select "Save Scoring". It stays unavailable while any answer has no credit.
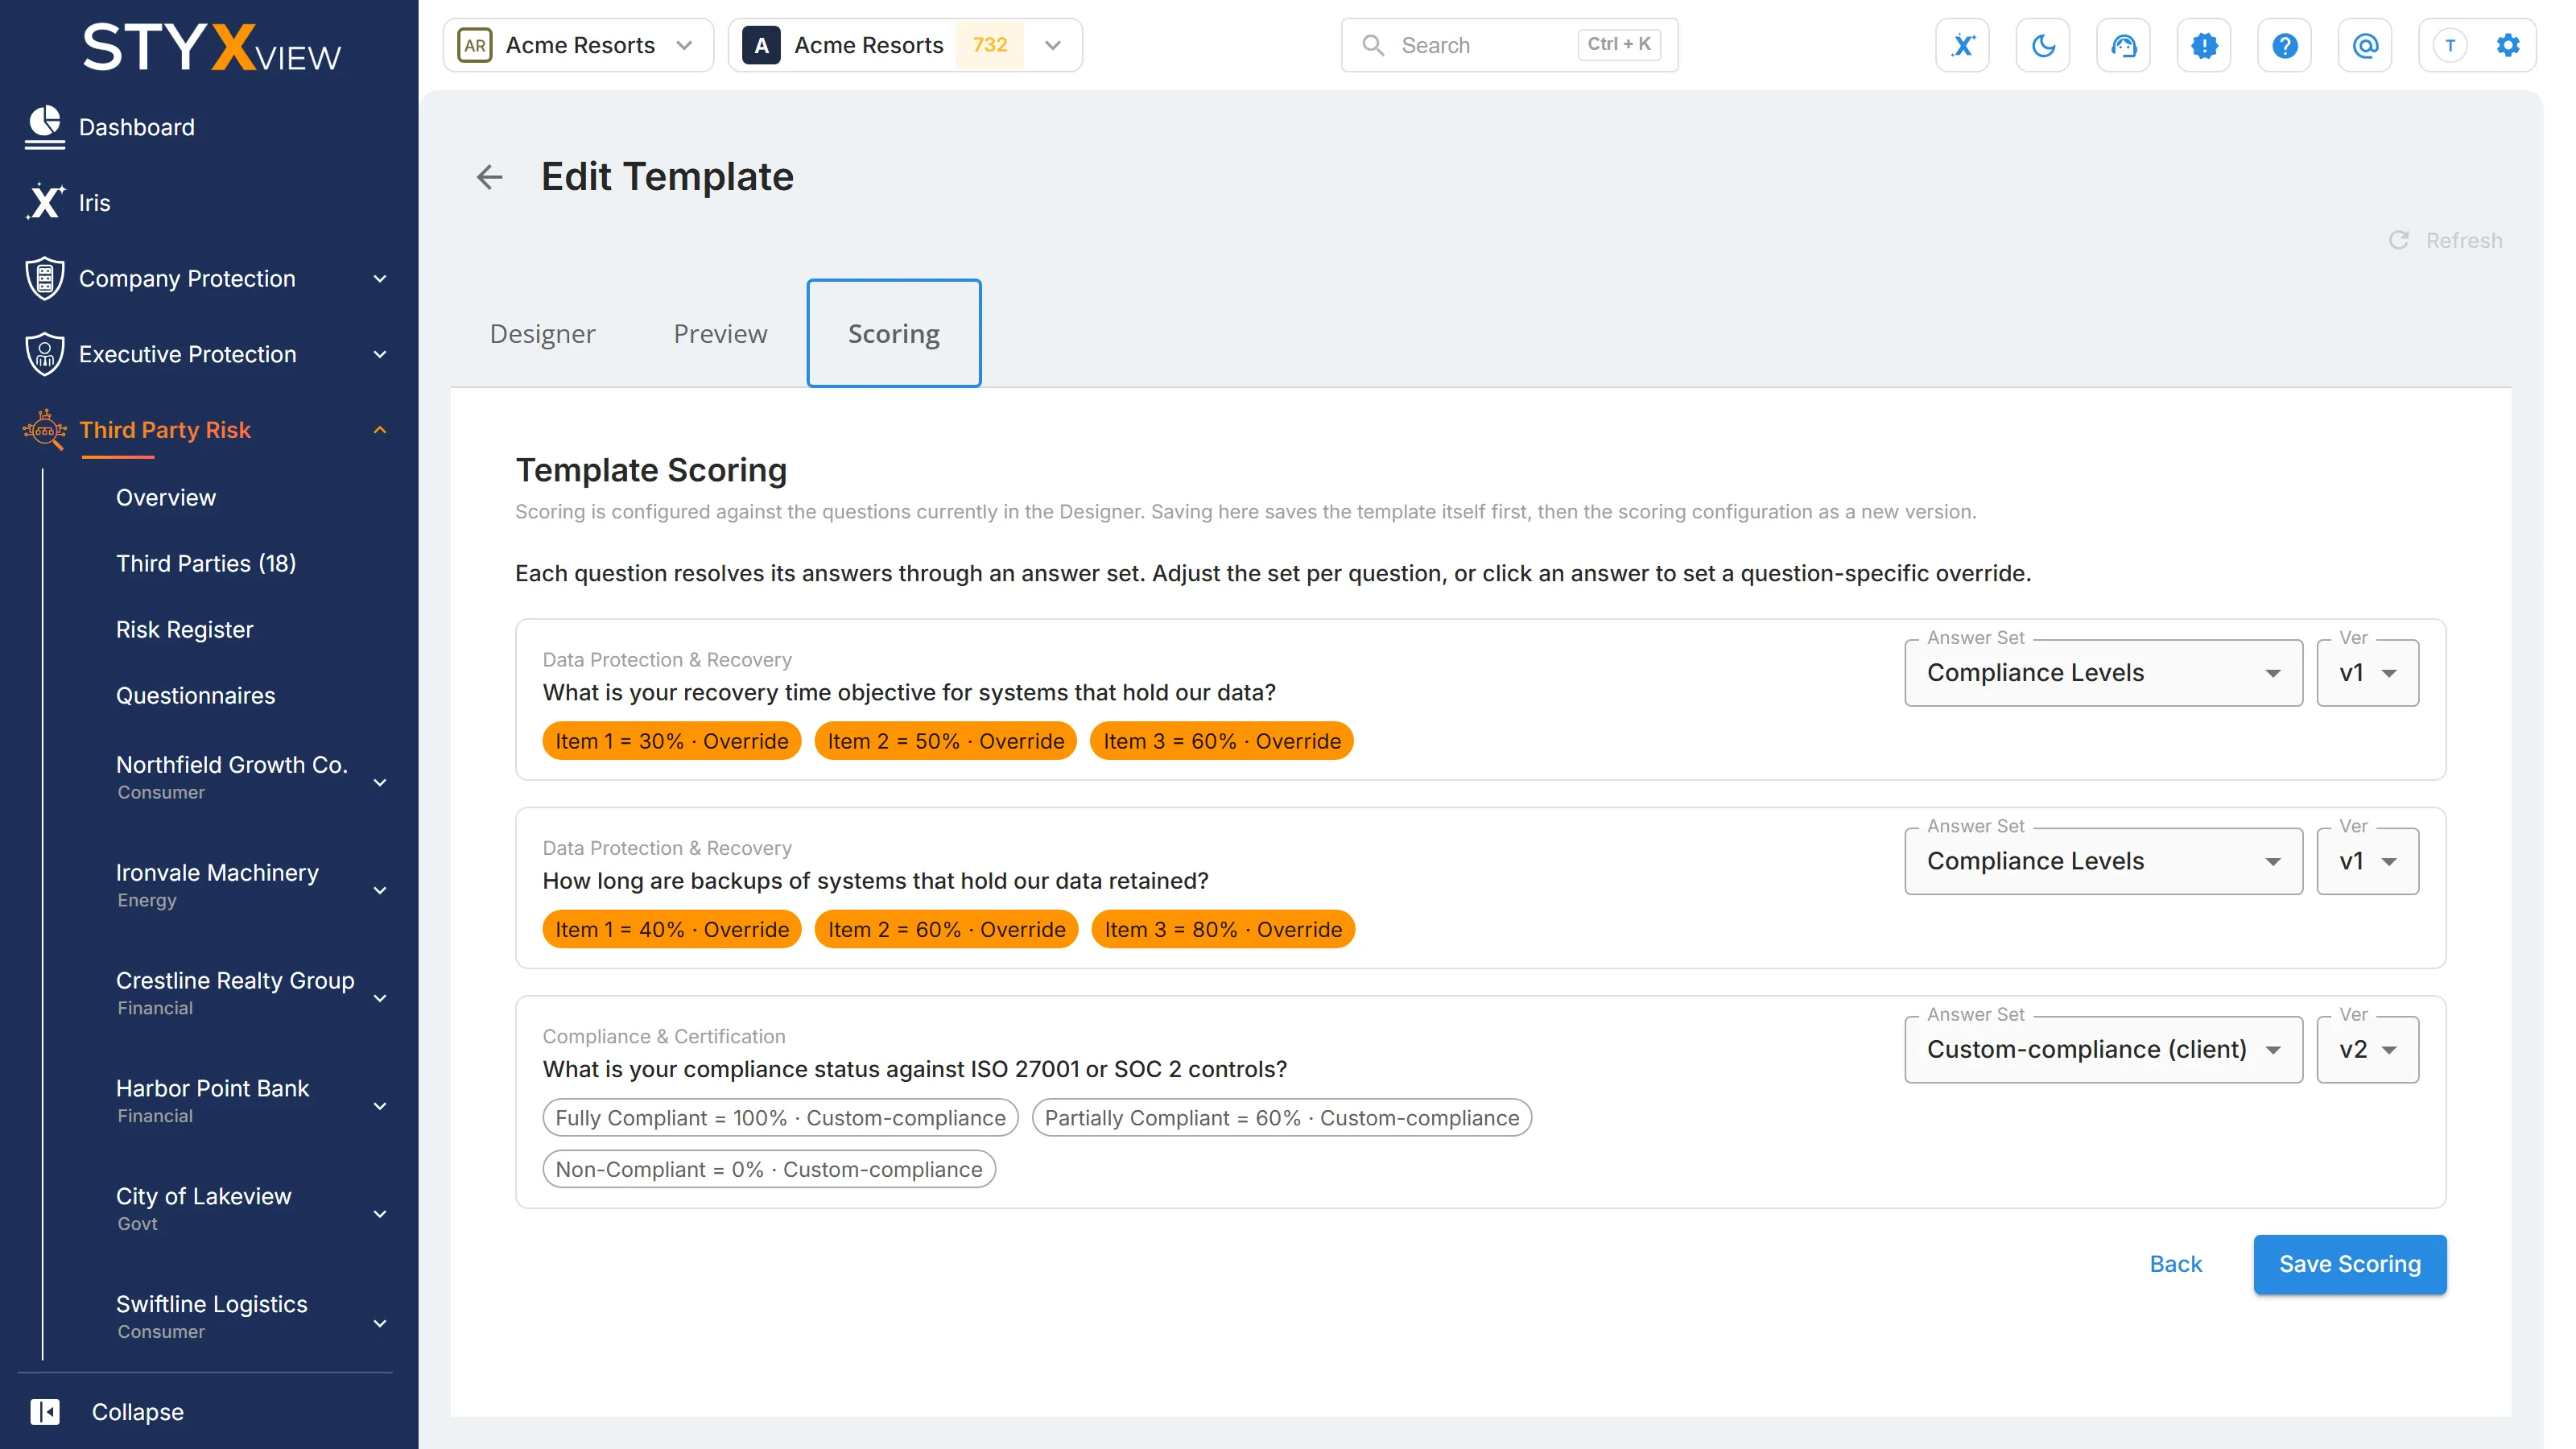
When scoring is saved, the "Scoring" column shows "Yes". Select "Review Scoring" to see the configuration, then "Edit Scoring" to change it or "Remove Scoring" to keep the template unscored.